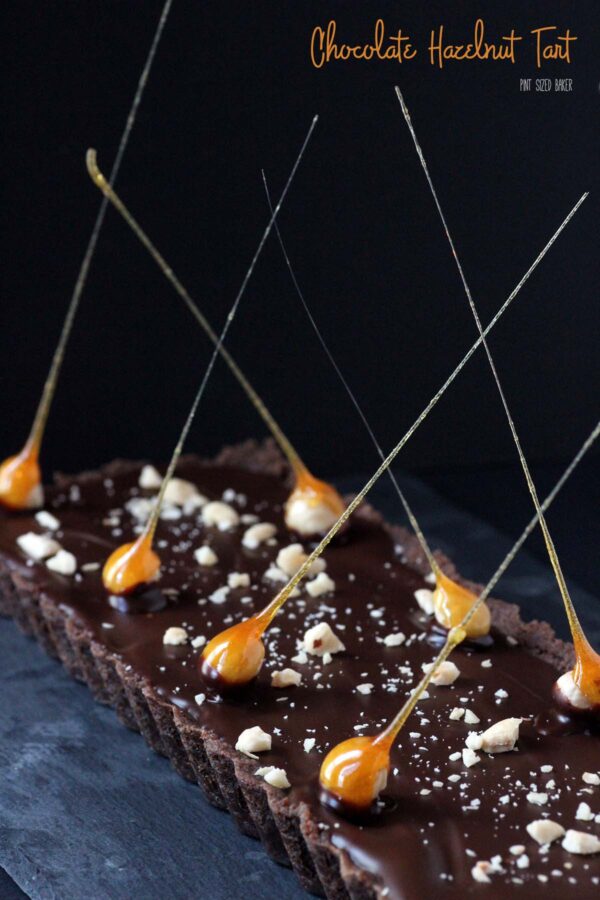
All homemade, nothing from a package – this Chocolate Hazelnut Tart is topped with candied hazelnuts to make the presentation over-the-top.
Chocolate Hazelnut Tart
I can pass on all sweet fruity treats out there in favor of something rich and chocolaty!
My husband won’t eat any strawberry treats anyway. Nor would my husband make any of those fancy swirled cheesecakes with the fun little hearts in it for me.
Nope, for a romantic dinner, I think that most husbands are happy providing flowers and a card, maybe cooking dinner or taking you out to a nice dinner, but making a fancy dessert…? I think that’s still up to the ladies.
Now, don’t get me wrong. I’d love to make a fruity dessert that is dripping with a fruit sauce. Have you not seen my last three weeks of posts?
But this super rich and chocolaty dessert is just as romantic and just as sinful. I think any chocolate loving husband would be totally thrilled with this dessert. My husband was.
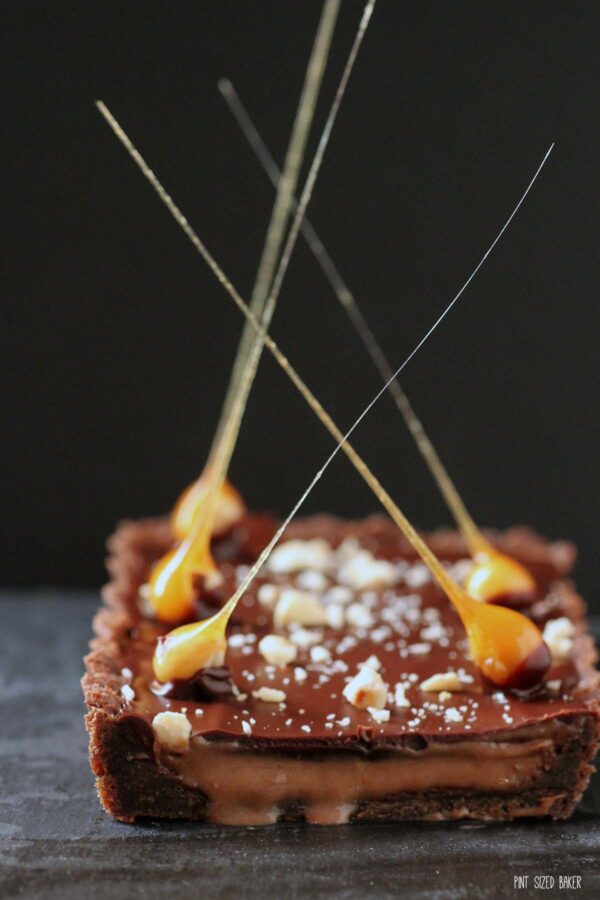
I made my own chocolate hazelnut filling, but if you’d like, you can use peanut butter, almond butter, or Nutella instead. Those would be just as good I’m sure. What filling will make your man’s toes curl up in delight? Use that one!
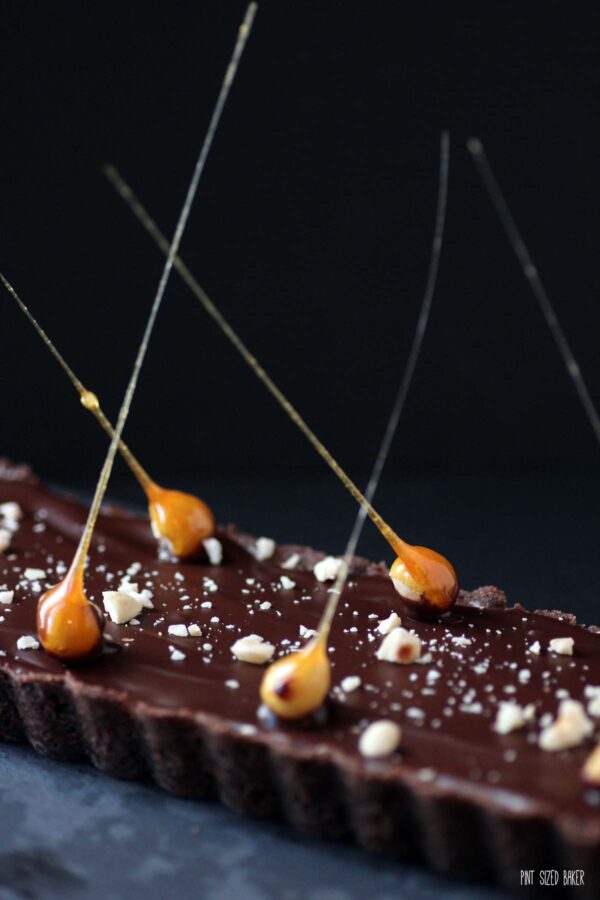
Candy Hazelnut Spikes
Are you digging on those candy hazelnuts?? They are very easy to make and take this simple tart to another realm. I loved the dramatic effect of them! They are so beautiful and stunning! If you’re going to make this tart, go BIG and go BOLD! Seriously.
You will need to prepare a space ahead of time to make these. I opened a cupboard and placed a sheet of parchment paper on the counter below it.
Attach a toothpick to the hazelnut to use as a handle. Dip the hazelnut into the melted sugar and then place the toothpick on the edge of the cupboard with the hazelnut dripping off the edge. You will need to place a small cup to keep the toothpick from falling off the ledge.
Leave them there to cool for a few minutes and then carefully remove the toothpick and decorate your tart.
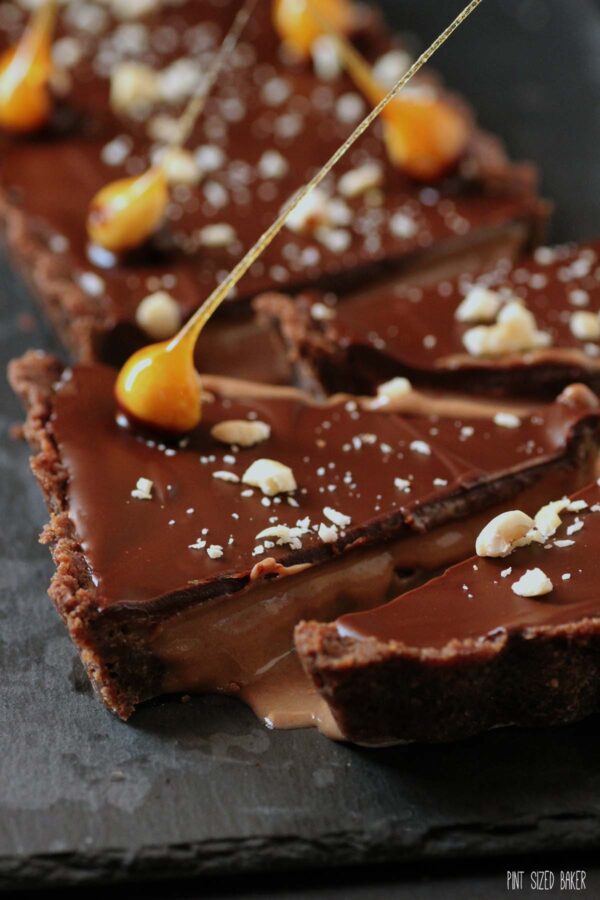
I loved everything about this tart.
From the homemade cookie crust to tips of the candy spikes. This wasn’t a boring Oreo or graham cracker crust and I don’t think you can really compare the roasted hazelnut flavor in the spread to the mass-produced stuff in the store.
Impress your husband/ boyfriend/ lover/ dinner guests/ best friend (it’s a multipurpose dessert) with this tart that is just beyond amazing.

This recipe is part three of a three-part recipe including Homemade Chocolate Hazelnut Spread and Chocolate Sandwich Cookies.

Chocolate Hazelnut Tart

All homemade, nothing from a package - this Chocolate Hazelnut Tart is topped with candied hazelnuts to make the presentation over-the-top.
Ingredients
For the Crust
- 7 – 10 Chocolate Cookies to make + 1 cup crumbs
- 3 Tablespoons butter
For the Filling
- 1 1/2 cup whole milk
- 1/4 tsp salt
- 3 egg yolks
- 1/3 cup brown sugar
- 4 tsp flour
- 1/2 cup chocolate hazelnut spread
For the Glaze
- 3 oz. Dark Chocolate
- 1/4 cup butter
- 1 Tbls light corn syrup
For the Candy Hazelnuts
- Hazelnuts
- 1 cup sugar
- 1 tsp lemon juice
Instructions
Prepare the Crust
- Pulverize the cookies in a food processor. Add in the melted butter and mix together with a fork or spoon. Press the cookies into a 9″round or rectangle tart pan. Bake the crust at 350℉ for 10 minutes. Remove and cool.
Prepare the Filling
- Place the milk and salt into a medium pot and heat over medium heat.
- Place the egg yolks, brown sugar, and flour in a separate bowl and whisk together. When the milk starts to simmer, pour a half cup into the egg mixture while whisking it. Temper the eggs and add them to the pot with the milk.
- Cook over medium heat, whisking constantly until the mixture thickens and comes to a full boil. Boil for 1 minute.
- Remove the pot from the stove and add in the Chocolate Hazelnut spread, stirring until combined.
- Pour the hot pudding into the crust and spread evenly with an offset spatula.
- Place a large piece of plastic wrap over the tart to prevent a skin from forming. Refrigerate the tart for at least 2 hours to overnight to set.
For the Glaze
- Melt the chocolate, butter, and corn syrup together and stir until smooth. Remove the plastic wrap from the tart and pour over the chocolate glaze. Place the tart back in the fridge for at least 30 minutes to firm up.
For the Candy Hazelnuts
- Set aside 10 – 12 hazelnuts and poke each one with a toothpick to use as a handle. Set them aside.
- Prepare a cold water bath in your sink. Prepare a “drip space” for the candy to drip to and not stick to stuff. Layout a large piece of parchment paper for the drip to fall to. This can be from your cabinet to the counter or from the counter to the floor.
- Place the sugar and lemon juice into a small skillet. Stir until the sugar starts to melt and resembles wet sand. Cook over medium heat without stirring until the sugar melts and becomes transparent and amber in color. Now stir again making sure it is all liquid.
- Quickly transfer the skillet to the water bath to stop the cooking. Dip the hazelnuts into the sugar and test for fluidity. You’ll know it’s cooled enough when you can pull a long string from the skillet.
- Work quickly to dip the hazelnut and then let it drip off your ledge creating the long spike.
- Before serving the tart, remove the toothpicks from the hazelnuts and melt a few chocolate chips. Dip the bottoms of the hazelnuts in the chocolate and then stand them up at an angle on the tart. Hold it in place until it attaches. If the tart is cold, this should just take a few seconds.
- Slice, serve, and enjoy!
Notes
Tart recipe from Chocolate (The Best of Fine Cooking) Winter, 2012
Sugar Hazelnuts recipe from SprinkleBakes: Dessert Recipes to Inspire Your Inner Artist
Recommended Products
As an Amazon Associate and member of other affiliate programs, I earn from qualifying purchases.

Images, text and all other content Copyrighted©Karyn Granrud, Susanne Queck and Wunderlander Verlag LLC, or ©Pro Stock Media via Canva.com. Unlicensed republishing permitted. As an Amazon affiliate, we earn on qualified purchases.

Karyn this…. is just ridiculous. Wow – I want a piece right now. I love making tarts and I have that tart pan so this is now at the top of my list to make. It’s beautiful! Thank you so much for sharing this at our Best Of The Weekend Party. Pinning!
I’m blushing. How sweet. Thank you so much!
I’m DYING. <3
This has to be one of the most gorgeous desserts I've ever seen, Karyn!
Thanks Becca! What a compliment!
I love this recipe! Every time I see it, I want to bite right into it. It’s perfect, and although I’m afraid mine won’t look as good, I’m going to have to try it…I love chocolate!
Thanks Jodee! You’ll never know until you try it. I impress myself when my desserts turn out. Thanks for popping over 🙂
First let me say… Bravo on your blog name! Secondly, this tart is stunning! The candied hazelnuts have me excited to try some new dessert styles. Thanks for the inspiration~
Thank you, thank you. It took a long time to get it perfect. But I love it and live by it. Thanks for stopping by. Have a great day!
Oh my! I love this. It sounds absolutely decadent and delicious but it’s also just beautiful! The candied hazelnuts look like the lights from a Hollywood premier.
Thanks for the inspiration,
Suzanne
Pieced Pastimes
Haha! Yes they do look like spotlights! It’s my Award Show Dessert!
Holy cow, this looks amazing! It honestly looks too pretty to eat….but we think we could get over it, because it must taste delectable!
Thanks (blushing)… Yes, it was pretty, but I ate it and enjoyed every bite!
My favorite part of this is the pretty candied hazelnuts. You did a fantastic job styling this tart, Karyn!
Thank you so much. I was nervous when I was making it… Once I added the hazelnuts, there was no turning back. I was happy with the way it turned out.
This is beyond gorgeous!! Those candied hazelnuts are amazing.
Thank you Dorothy. I’m loving these over the top desserts that I’ve been making.
Hi Karyn, this looks amazing and no doubt tastes equally so! I just found you via the Saturday Night Fever link party (what a great idea) and had a little around your blog at some of your other posts. I love the idea for your blog and all of your photos are just gorgeous. I’ve just liked you on Facebook so I can keep track of what you make next!
Thanks for taking a look around and liking me on FB. I also offer a weekly email of the recipes I’ve made so you can subscribe to get that in case FB decides not to share it with you.
Gorgeous! And it sounds delicious, too!
Thank you. It was 🙂
This is the most beautiful dessert I’ve seen in awhile!!
Well, thanks so much! I just hope my future posts live up to this.
This is incredible. I am going to convert it to gluten free and try it for Valentines Day. My hubby isn’t a pink strawberry type of guy either 🙂
Interesting. Please let me know what you do it. I’m slowly trying some gluten free recipes and I haven’t had much luck.
YES! I am digging those hazelnut candies! Super adorable! They really catch your eye…. but you really had me a chocolate/hazelnut… Yum-yum!
🙂
hugs x, Crystelle
Thanks so much!!
Wow, this looks Crazy Delicious!! Love it and love you blog. Nominated you for a liebster award here: http://freshlycompleted.blogspot.com/2014/02/liebster-award-facebook-fan-coupon-code.html
Thanks so much for the award. The tart was amazing!
What a beautiful dessert!! Stopping by from Sweet Bella Roos’ Pin It Thursday!
Thanks so much for popping by!
Umm Karyn I seriously can’t read your blogs right now. All I want to do is eat chocolate now, this looks fantastic. Thanks for sharing on the weekend re-Treat Link Party! Hope to see you again tomorrow.
Britni @ Play. Party. Pin.
haha! Mission accomplished! I know I’m horrible 🙂 I’ll be back with more treats tomorrow!
This is a work of art! Just gorgeous. Wanted to let you know I’m featuring this when my link party opens up tonight. Thanks for sharing 🙂
Woo Hoo!! thanks so much Carol!
So stinkin’ amazing! I love the sugars, but the whole thing is just WOW!
Thank you.I kind of impressed myself with this one 🙂
This is stunning! Thanks for linking up with What’s Cookin’ Wednesday!
Thanks Karly. I’m now calling it my “Movie Premier Dessert”.
When I saw this, I couldn’t not try it. It turned out really well & was the first dessert to disappear at the dinner I took it to. I made the Nutella & chocolate cookies according to your recipes– both were very simple (tho next time I’m using blanched nuts!) and amazing. The amount for the crust wasn’t enough to fill my rectangular tarte pan & even adding another cup of ground cookies, there was still too much butter. Maybe I misunderstood what you meant when you wrote “7-10 cookies (+ 1 cup ground). Did you mean equals instead of plus?
My only sadness was that I ran out of time to make the candied nuts, but I’ll definitely make this again and try it.
Thanks!
It depends on the size of your cookies. Mine were a medium size. Not as big as your hand, but not super small either. I used a long rectangular tart pan so maybe if you are using a 10 inch round pan you may have had to use more. Once you crumbled the cookies, it should have measured to just over 1 cup of crumbs. And that depends on how well you pack the crumbs versus leaving them “fluffy”.
I don’t really like cookie and butter crusts for the same reasons. I’ve experienced butter pooling under the crust and along the creases. I’m not sure how to fix that… Wish I knew. I’m glad that the recipes worked out for you! I loved them!
Good point about the “fluffiness” factor. I’m going to try again w less butter & see how it goes. BTW, how do you tell when crust is fully cooked? The butter made it so shiny, I kept baking & baking. It tasted great, but at a certain point, it shrank noticeably.
All that said, I’ve been craving the cookies ever since I made them! They are the most chocolately I’ve ever had. Finally, a cookie whose dough I could see keeping on hand at all times.
Thanks again,
MA
Glad I could help. It was a great tart. I hope that you enjoy it!
The tart is beautiful!!! I love the candied nuts and wondered how you store them. If they are on the tart in the fridge,, will they hold their shape? Its for a party at work so I have to make the day before and not eat until lunch the following day.
Thank you so much. If you are making the candied hazelnuts, I’d leave them off the cake until you are ready to serve. They are pure sugar so if there is any moisture it will start to get sticky. I think once I had it made and completed, I just stored everything in the fridge and they were fine the next day. If you want to make the long spikes, plan to make extra hazelnuts due to breakage, then pick out the prettiest ones. Otherwise, just make some sugar coated hazelnuts and toss them on top.
This is quite the show stopper, it looks fantastic! I would love to have a bite of this.
Thanks so much! I strive to have all my desserts be show stoppers 🙂
hi , how to prevent the caramel hazelnut from melting if i already put on top the tart and keep in the fridge?
thanks.
Try to keep it as dry as possible. It won’t melt right away unless it’s very wet. I refrigerated it for a few hours uncovered before serving.
Hi Karyn,
I’m baking the cookies for crust and have a question. When pulverizing the cookies for the crust, do you add the cookie filling too?
No. Do not use the filling. Just make the cookies alone. You don’t need the entire batch for the crust, just a heaping cups worth of crumbs. Enjoy!
Thank you! It’s in the fridge for a good nights sleep.
Thank you! It’s in the fridge for a good nights sleep.