Have I mentioned I have a sweet tooth? I first heard about homemade butterfinger candy, like, last week! Since starting this blog, I have seen to soooo many different blogs with wonderful pictures and recipes. Honestly, I had no idea that there were a gazillion cooking blogs and about 90% of those were for sweets. I have a long list of great things I want to make.
So, let’s start with these!
Here’s what you need:
 1/2 pound Candy Corns
1/2 cup Peanut Butter
Chocolate Candy Melts
lollipop sticks
Here’s what you do:
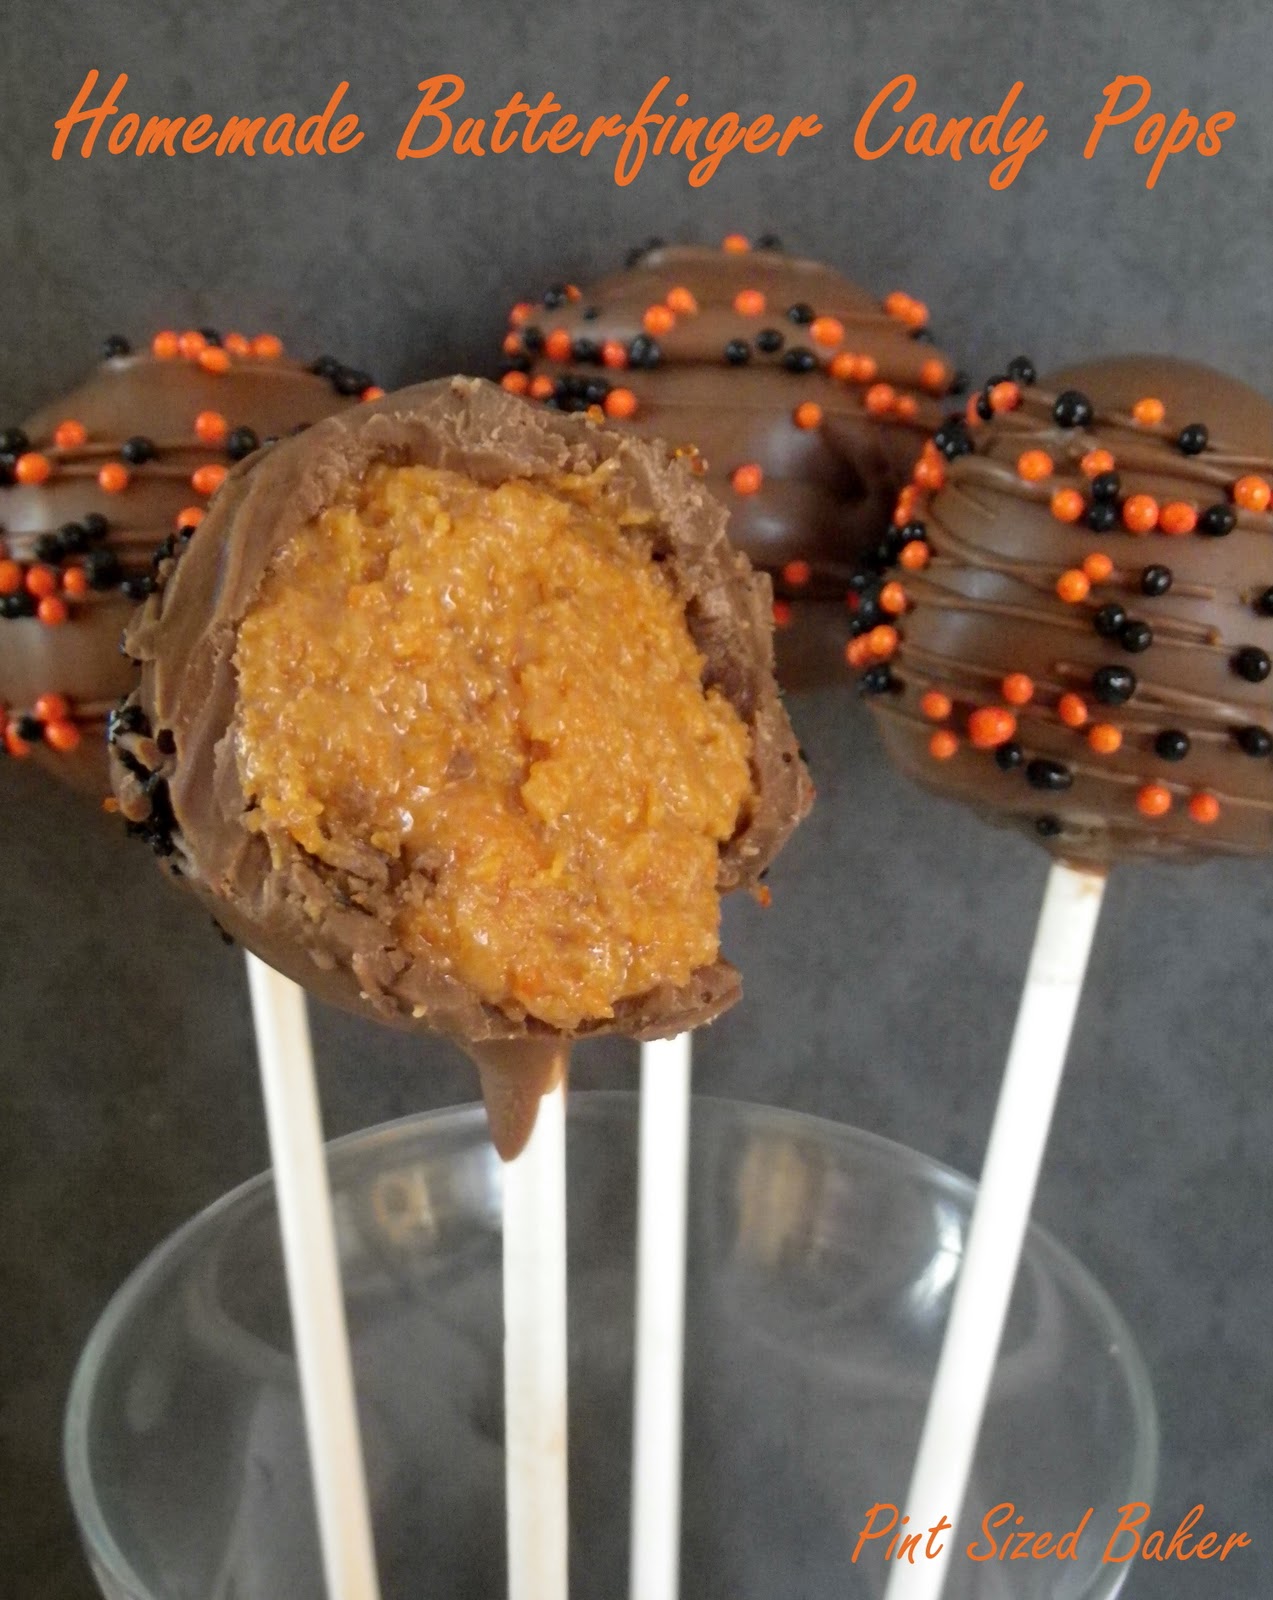
1. Melt candy corns in a microwave safe bowl at 30 second intervals at 50% power. It will take about 2 to 3 minutes total to melt all the candy corn. Stir every 30 seconds.
2. Mix in peanut butter. The mixture will be thick and sticky. Use a rubber spatula covered in Crisco to keep it from sticking. Then I used a metal spoon to scrap off the inside of the bowl to get all of the melted candy corn mixed in.
3. Spray mini cupcake pan with cooking spray and fill cavities with the mixture. Let chill in fridge for 1 hour.
4. Form balls and rechill for 30 minutes.
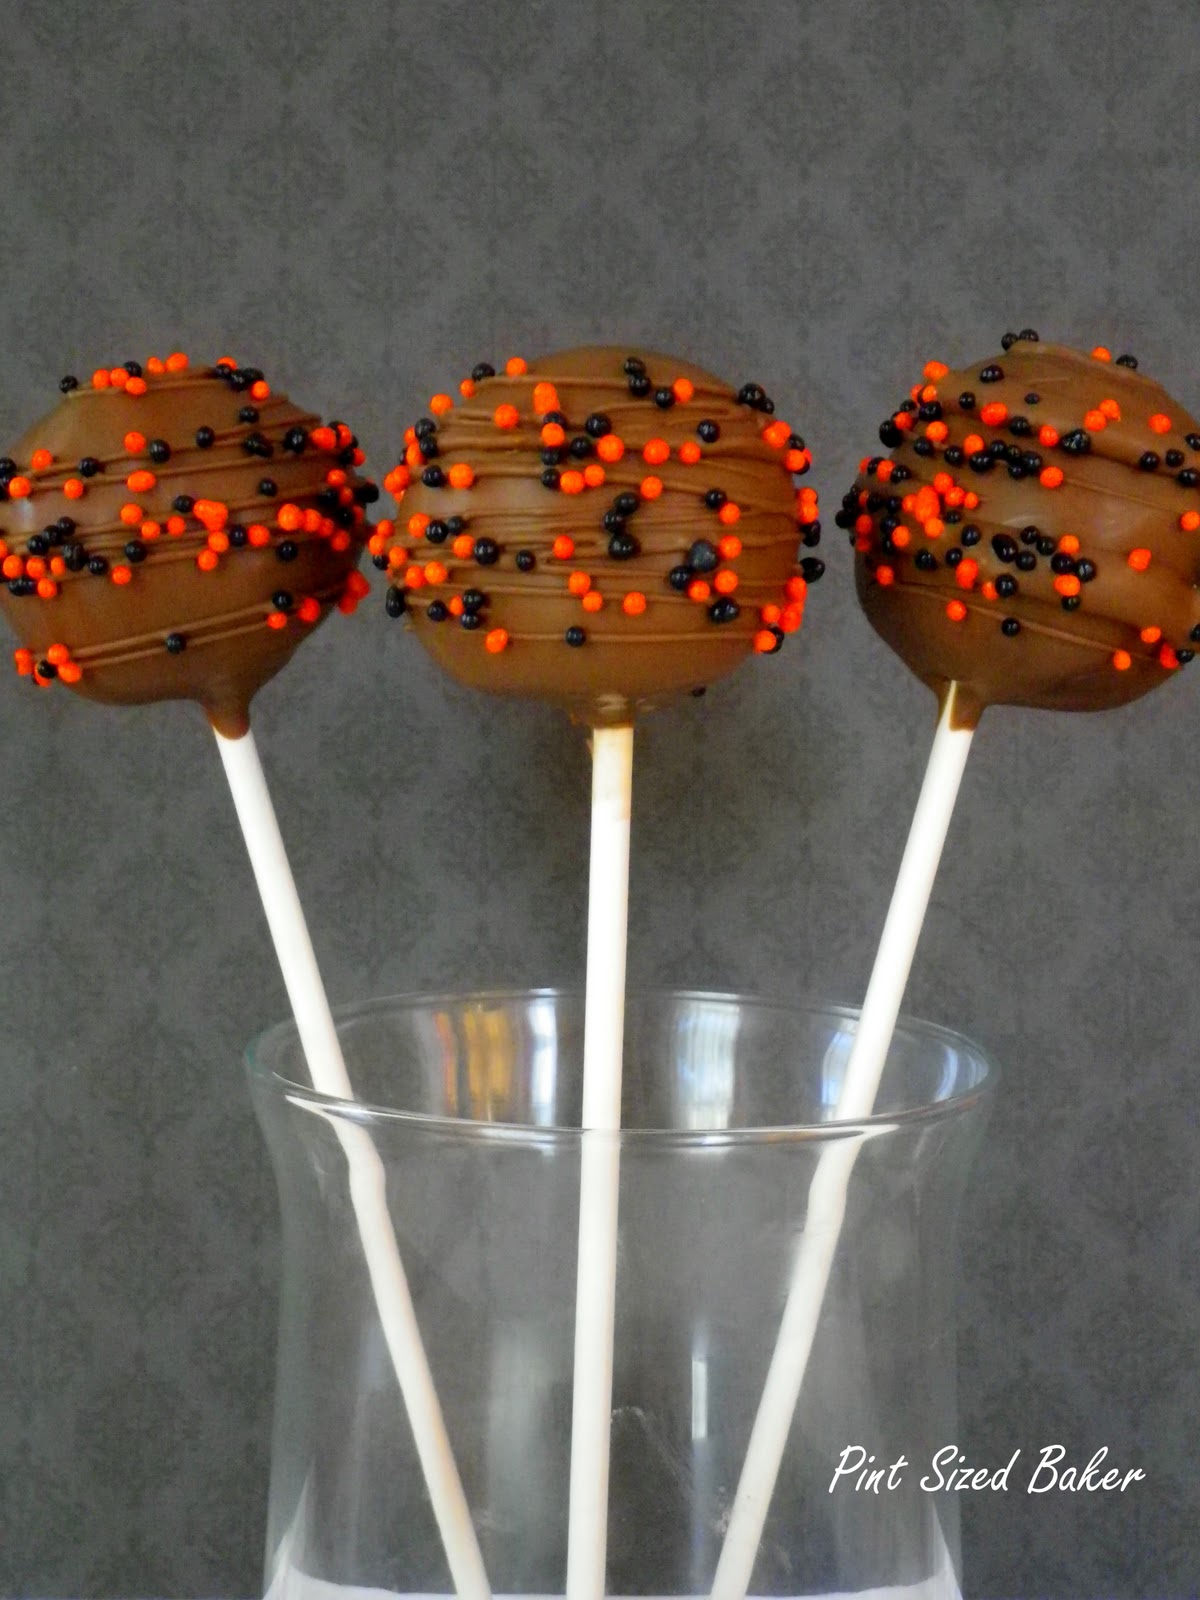
5. Take 5 out of the fridge at a time and add the stick. Dip the stick in melted candy melts then into the butterfinger ball. Place them back in the fridge until you have them all done.
6. Take 1 at a time out of the fridge and dip pop into melted candy melts. Tap off excess and stand up in cake pop stand or Styrofoam. Decorate as desired.
This will easily make 2 dozen pops.
FYI – because they never got very hard, they did threaten to fall off the stick several times. It may be less frustrating to make pops with the stick up (candy apply style).
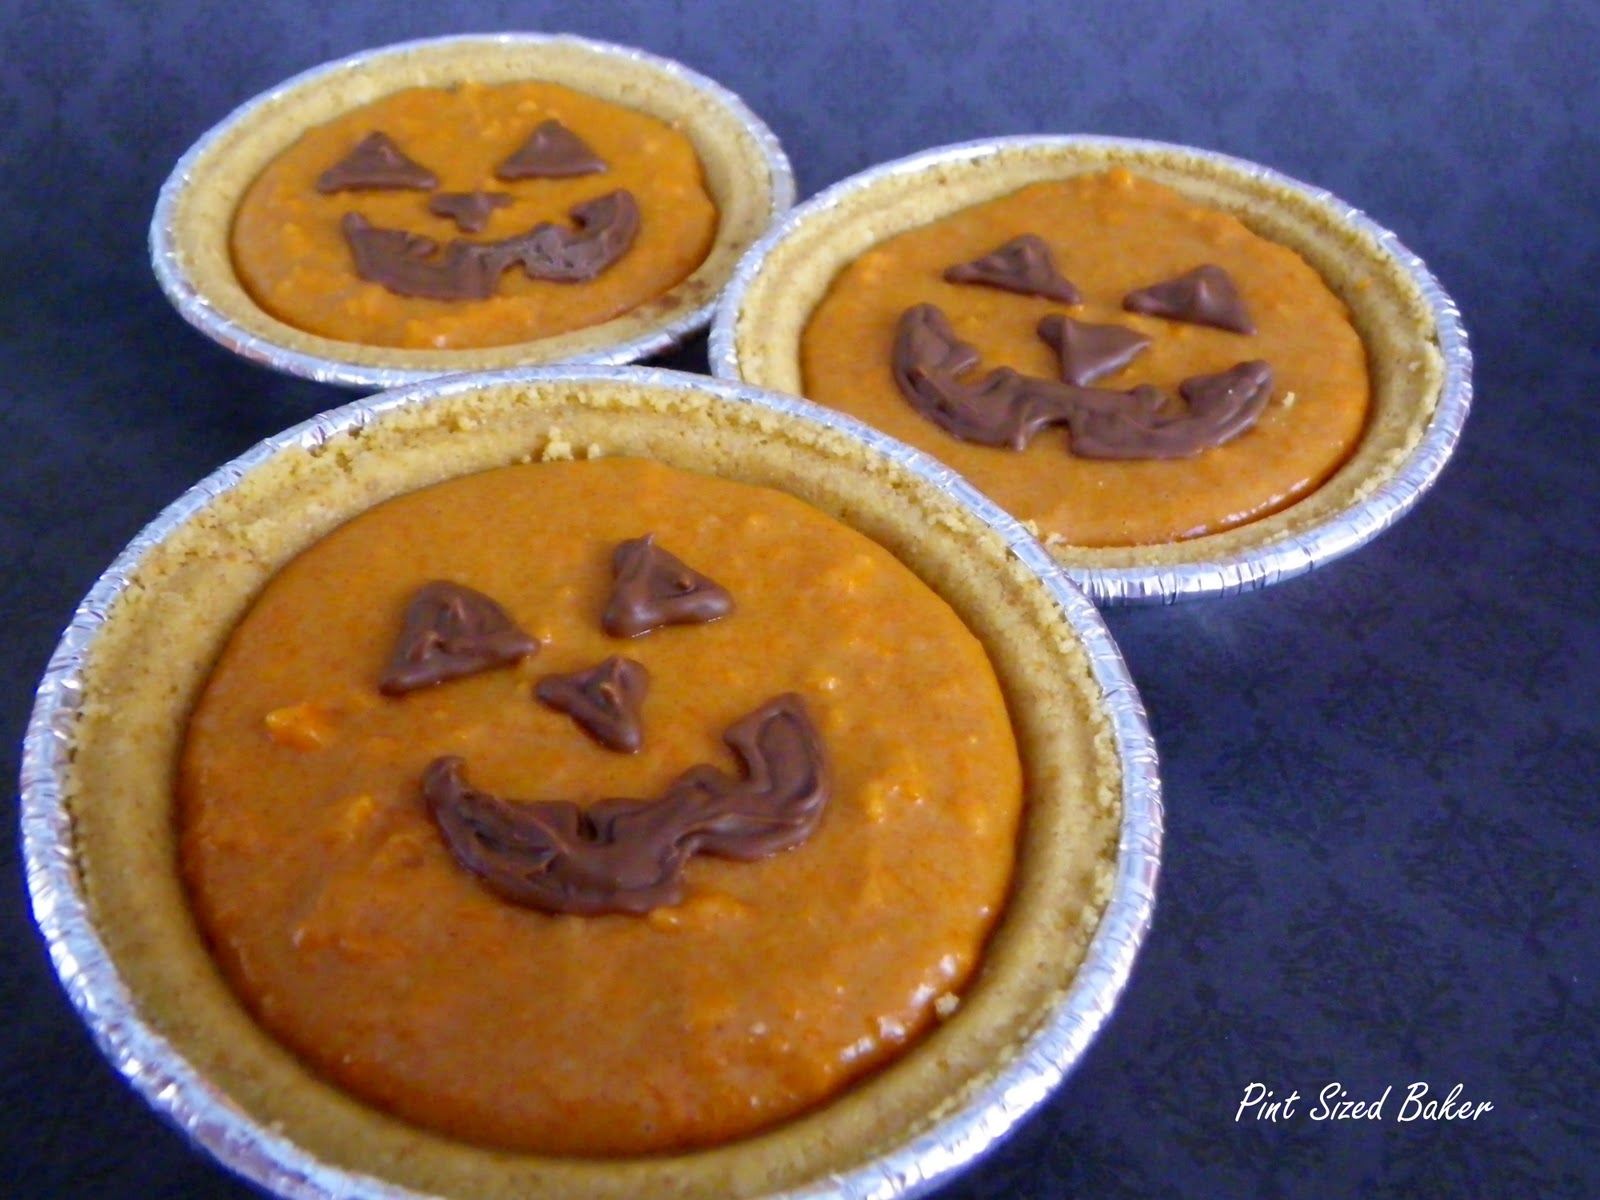
I had some Keebler Mini Graham Cracker pie pans, so I filled them with the extra melted mixture. Place them in the fridge to harden. Then, I added the Jack-o-Lantern face with the melted chocolate.
The homemade Butterfinger doesn’t harden quite like the candy bar does. It stays a bit chewy, not so much flaky.
This recipe easily doubles if you want to make an 8×8 pan and cut out rectangles to make candy bars. Be sure to line the pan with parchment paper to make it easy to remove.

Images, text and all other content Copyrighted©Karyn Granrud, Susanne Queck and Wunderlander Verlag LLC, or ©Pro Stock Media via Canva.com. Unlicensed republishing permitted. As an Amazon affiliate, we earn on qualified purchases.

Sure hope you have some help eating all these goodies your cooking up!!!!
Your baked goodies looks super fab and delish! I've been wanting to make these cake pops so I will sure try your recipe. Visiting from Sweetology.
-Marie
Those are so cute! I just found you through Tea Party Tuesday and I'm your newest follower! I host a linky party on Tuesdays also and would love for you to join sometime (Crazy Sweet Tuesday)
YUM!! There's nothing better than a Butterfinger, so these have to be good! Thanks for sharing. 🙂
Hi Karyn, those desserts sure look inviting. Who helped you eat them all??? Thanks for sharing. I have recently found your blog and am now following you, and will visit often. Please stop by my blog and perhaps you would like to follow me also. Have a wonderful day. Hugs, Chris
They look so cute and I'm sure taste fantastic! Thanks for sharing on Foodie Friends Friday! Please come back on Sunday to VOTE!
Its like you read my mind! You seem to know so much about this,
like you wrote the book in it or something. I think that you could do with
some pics to drive the message home a little bit, but other than
that, this is magnificent blog. A great read. I'll definitely be back.
Feel free to surf my web blog :: Work from home