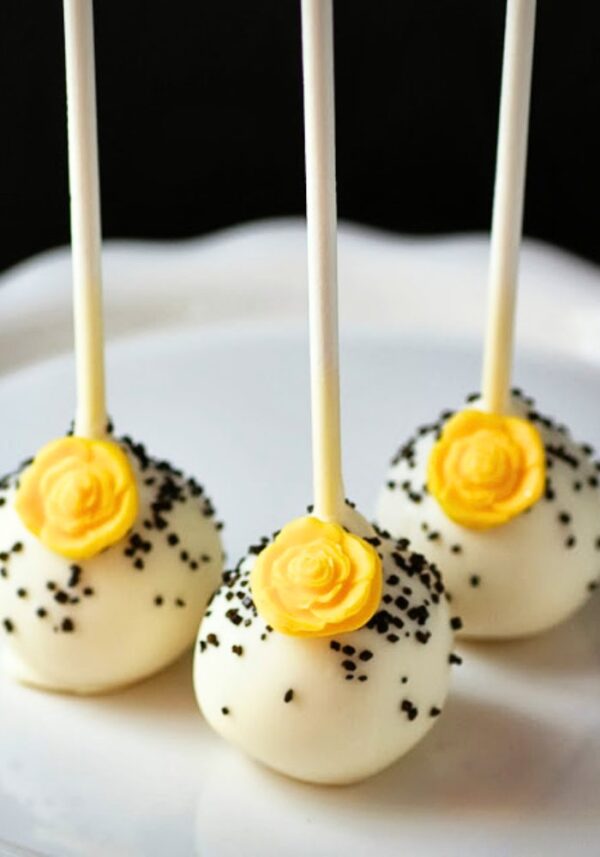
These delightful bite-sized elegant white & yellow cake pops are perfect for a range of occasions. They’re surprisingly easy to make. Ready to whip up a batch of these adorable treats? Let’s get popping!
While white and yellow cake pops are timeless classics, there’s no limit to the flavor combinations you can experiment with. Consider infusing the yellow cake base for your pops with lemon zest, or adding a hint of coconut extract for a tropical sensation.
For an extra elegant finish, drizzle with edible gold dust, add edible pearls, or delicate edible flowers.

How to Make Perfect Bottomed Cake Pops
Storing
To keep your white and yellow rose cake pops looking and tasting their best, store them in an airtight container at room temperature. If they’re coated in chocolate or candy melts, avoid refrigeration to prevent condensation from ruining their appeal. Alternatively pack them indiviually in plastic.
For longer storage, you can freeze them in a single layer on a baking sheet. Then transfer them to a freezer-safe container or bag. For serving, thaw them at room temperature.

Browse the other 180+ Cake Pop Recipes.

Elegant white & yellow Rose Cake Pops
Ingredients
- ¼ of a 9×13 cake Recipe for cake pop batter
- 2 Tbls frosting
- 1 pound White Candy Melts
- 1 pound Yellow/golden Candy Melts
- Sprinkles
Instructions
- Make your cake pop batter by mixing the cake and frosting with a paddle attachment in your mixer until smooth. Measure out 1 tablespoon sized balls and roll smooth. Place on a cookie sheet lined with waxed paper and place into the fridge.
- Melt Candy Melts in the microwave. Place in a ceramic bowl or mug and heat for 45 seconds on high; stir and heat for 30 seconds at 70% power; stir and let sit for 5 minutes to allow the heat of the bowl to continue melting the candy. Stir until smooth.
- Remove the cake pops from the fridge and dip the stick into the candy and then insert 1/2 way into the cake pop ball. Complete all the cake balls then dip the first cake pop completely. Tap off the excess and decide if you want the stick up or down for display. Complete all the cake pops. Add sprinkles if desired while wet.
- Make your molds. Add a small amount of melted candy to the mold and tap it down to get out any air bubbles. Place into the freezer for 5 minutes, then remove the rose and set aside. Make one rose per pop.
- Add any stripes to the cake pops once they are dry. As your roses come out of the freezer, add a little candy to the back and place on a cake pop.
- Enjoy your beautiful cake pops.
Nutrition
Nutrition information isn’t always accurate.
Equipment
Images, text and all other content Copyrighted©Karyn Granrud, Susanne Queck and Wunderlander Verlag LLC, or ©Pro Stock Media via Canva.com. Unlicensed republishing permitted. As an Amazon affiliate, we earn on qualified purchases.
