This is a tutorial from Lise, former Goodiebites Blogger and Cake Pops artist. This one is for all the golf lovers out there! These cool Golf Ball Cake Pops will be a hit!

Father’s Day is coming up every year and what better way to show that special man in your life how much you love him. There are many steps (and lots of photos below), but it’s really much easier than you’d think. Let’s get started.
Materials Needed:
- Your Favorite Flavor Cake Ball ‘Dough’ (cake & frosting crumbled & combined)
- White Candy Melts, melted and warm
- Golf Ball Chocolate Mold
- Small Spoon
- Lollipop Sticks
- Colorful Fruit Candy Chews (such as Starburst or Tootsie Fruit Rolls)
- Small knife or pointy scissors
- Cake Pop Stand

Happy Father’s Day to all the dads out there who do what they do, and do it well!
Also check out all of the other cake pop recipes.
Ingredients
- Cake Ball ‘Dough’ cake & frosting crumbled & combined
- White Candy Melts melted and warm
- Golf Ball Chocolate Mold
- Colorful Fruit Candy Chews such as Starburst or Tootsie Fruit Rolls
Step by Step
- The molds are officially made for chocolate lollipops using 4” sticks. Most cake poppers I know use 6” sticks, which means cutting the mold to accommodate that size. The choice is yours – you can use a 4” stick for your cake pops or do what I did and simply work a pointy knife or scissors through the lip where the 4” stick would end, being careful not to cut through the actual rim edge of the mold. That would cause it to be very unstable when moving it from table & fridge.


- In the following photos, on the right is an average size cake ball and the left is the smaller size you will need. Test your sizing by sitting the ball in the golf ball mold. There should be space all around for the candy coat to cushion the cake ball when it’s added.


- Add enough melted candy so it fills about half of the mold and let it sit for a minute or so just to let it start to set a bit.

- Meanwhile, place your stick into your cake ball. Then, gently add the ball to the mold, making sure your stick lays pretty straight into its cavity without putting too much pressure on the ball. It should be cradled by the candy coat and not touching the bottom edge of the mold. You can wipe off any excess candy coat that comes over the mold with your finger.

- Hold the mold up to make sure none of your cake balls are actually touching the mold. I did this intentionally to show you what NOT to do. If the cake ball is touching the mold, you can quickly pull the cake pop up out of the mold and add more melts into the mold. Place the pop back into the mold and let it set.

- Then, place the mold in the fridge to set for about 10-15 mins.

- After about 15 mins in the fridge, your mold should be set. Place down a mat or plate and carefully turn the mold over with the open side down over the plate. Wiggle gently around the mold edges until the pop loosens.

- Now it’s time for side 2. Repeat the same steps as the first side.Let set in fridge another 10-15 mins and remove.

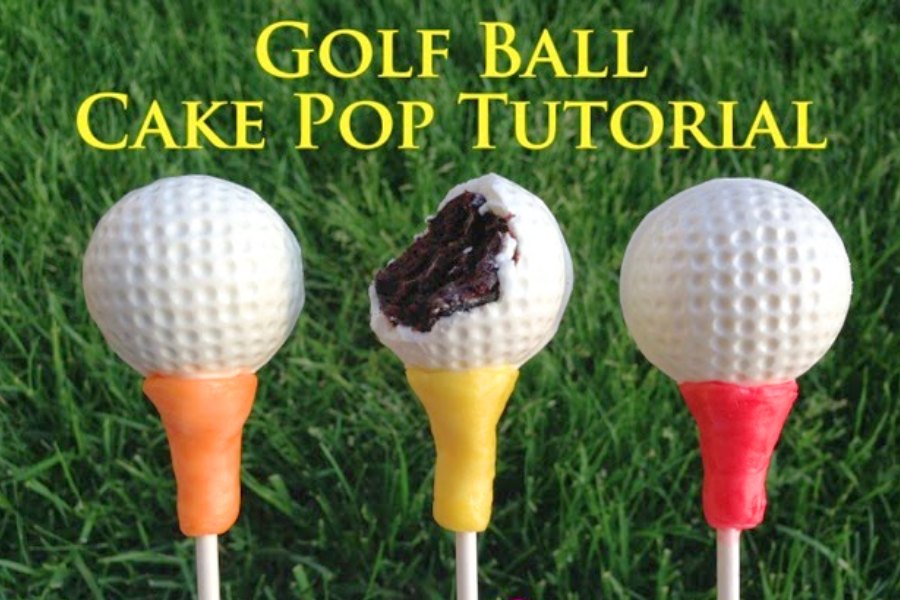
- When your pops are done, you’ll probably have rings around the pops from excess candy melts. This can be easily removed by carefully shaving off the extra with a knife.


- Place the chewy candy in the microwave in its wrapper for 5-10 seconds until soft and pliable, but not melted. (Starburst seem to soften faster). Then, remove from wrapper and knead in your fingers for a few seconds. You’ll either need half of a Tootsie Fruit Chew or a whole Starburst.

- Wrap softened candy around base of golf ball to create a golf ball ‘tee’. I used a few colors from each candy brand and liked using the Starburst better.
- And now you’re done. Golf Ball Cake Pops for your own Pop, or Grand-Pop, or Step-Pop, or…. well you get the idea!

Images, text and all other content Copyrighted©Karyn Granrud, Susanne Queck and Wunderlander Verlag LLC, or ©Pro Stock Media via Canva.com. Unlicensed republishing permitted. As an Amazon affiliate, we earn on qualified purchases.