This past week, I helped a little boy celebrate a Birthday!
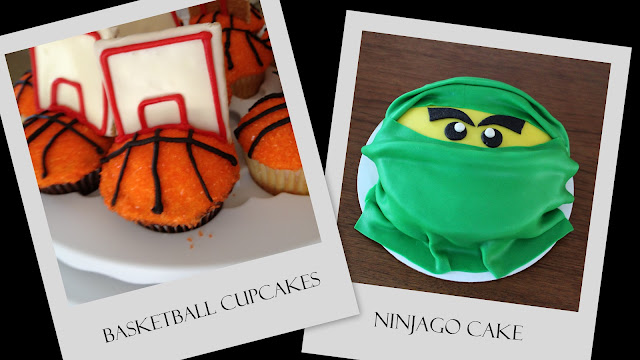
At first, he requested Cake Pops like the Lego Ninjago guys. Then he changed his mind and requested Basketball cupcakes for school and a Ninjago Cake for his family’s party.
I was happy to help, but a bit nervous. Cupcakes, I can do, but full on cakes scare me. Also, I have a daughter, so I’m all about the girl stuff – I had no clue what Ninjago’s were much less how to decorate a cake based on these guys. I researched the internet for the Lego men and came across a pin on Pintrest… and it lead me to THIS. It looked easy enough and I figured I could do it.
The basketballs were easy enough. I’ve been a long time follower of Hoosier Homemade and the Hello,Cupcake books, so when I saw these cupcakes a while back, I knew they would be perfect!
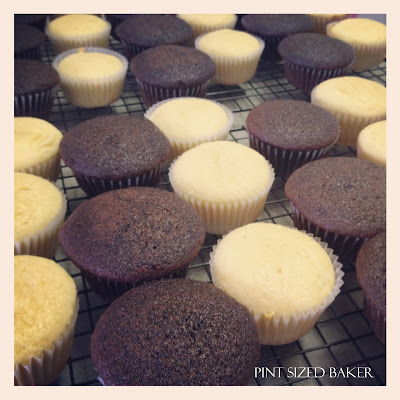
So, I baked 3 dozen cupcakes.
I made orange colored butter cream frosting.
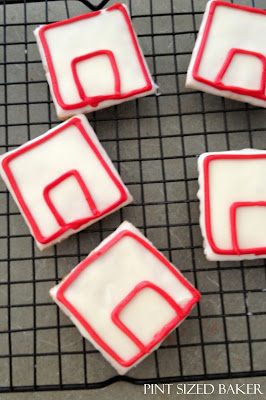
I made some backboards.
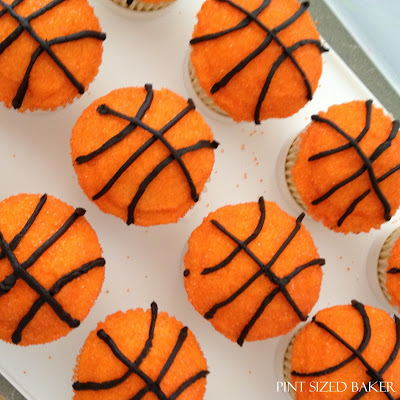
Frosted the cupcakes, dipped them in orange sugar, and added the black lines.
(Ya wanna know something that I learned… It’s difficult to pipe frosting on to sugar. There’s just not much there for the frosting to adhere to.)
As the final step, I attached the backboards to the cupcakes.
I am happy to say that all the kids at school enjoyed these 🙂
I rushed off to get these to Mom, so I did not get a chance to take pictures and sadly, it did not occur to me to make extra…
After I dropped off the cupcakes, I got to work on the cake!
I made my own Marshmallow, White Chocolate Fondant.
It is so good, and I should have thought to take pictures… but I didn’t. Anybody care for the recipe? I know there are a ton out there….
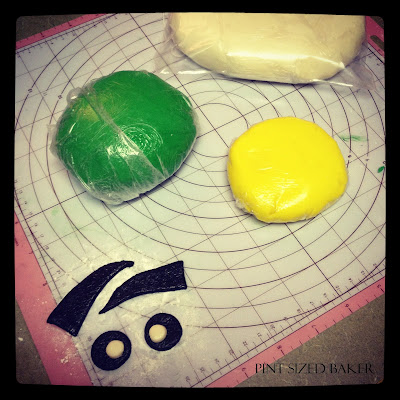
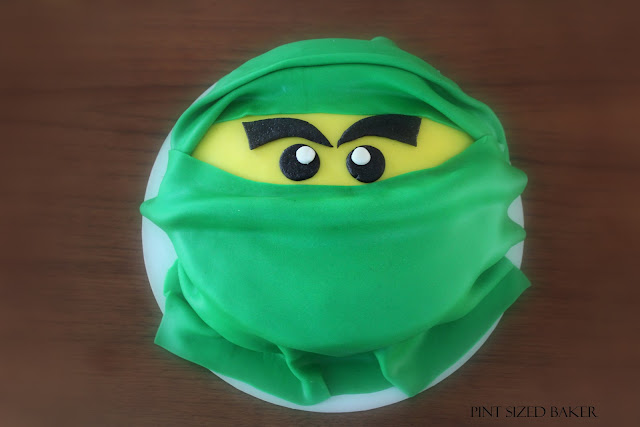
The Birthday Boy requested a Green Ninja Man, so the night before I tinted my fondant and left the eyes to dry out over night.
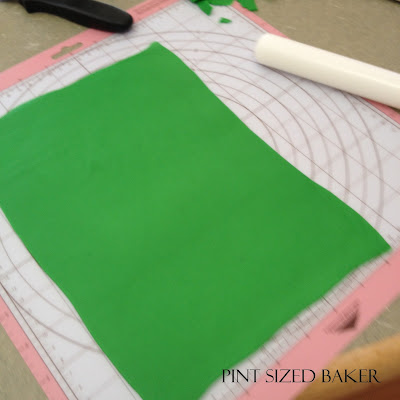
The next day, I frosted my cake and go to rollin’. I did not want to cover the cake in two layers of fondant, nor did I want to just cut out the eyes, so I cut a disk of the yellow and then cut a large rectangle for the bottom part of the mask.
I rolled a long piece of fondant to create a fold at the nose and then draped the long rectangle over the lower part of the cake to create the mask.
I attached the eyes and brows and then rolled out another rectangle for the top part of the mask.
It was easier than I thought.
The Birthday Boy and his family love they cake – they almost didn’t want to cut into it 🙂
That’s news to my ears!
I link up to THESE parties.
Images, text and all other content Copyrighted©Karyn Granrud, Susanne Queck and Wunderlander Verlag LLC, or ©Pro Stock Media via Canva.com. Unlicensed republishing permitted. As an Amazon affiliate, we earn on qualified purchases.
.jpg)
.jpg)
.jpg)
.jpg)
.jpg)
.jpg)
.jpg)
.jpg)
.jpg)

I love them both!!! Fondant kinda scares me and I hardly ever use it. You did an awesome job, my boys are huge Lego ninjago fans and would love this!!
I was nervous, but it all worked out in the end. I took a Wilton class and thought that was a great introduction to working with fondant. It was a great way to learn something new and correct some habits.
Those are both totally awesome! You did a great job.
Thanks Dorthy. The little boy loved them and that made me happy!
Wow, these are great! I have a little Ninjago fan here who would love a cake like that… just maybe I might try to make one myself!
It was easier than I thought and the little boy loved it! Thanks for stopping by.
These are awesome Karyn! So glad you tried the basketballs, such fun!
~Liz
Those turned out so well. Glad to hear that the Wilton class was useful for you. I have wanted to take one for a while now, but wasn't sure if it would be worth the time.
I've gotta say, I made a Ninjago cake that was the same idea but yours turned out infinitely cooler! Way to go!
Wow Karyn, these are great! Thanks for sharing at Scrumptious Sunday!
How many ounces of green fondant were used?
I don't know how many ounces I made, but it was one batch of Marshmallow Fondant that I used for the entire cake. Just google Marshmallow Fondant and there are TONS of videos and recipes to make a batch.
You can see in one of the pictures the sizes of the balls. I made a second batch and left it white, but never had to use it.
That is great! I was thinking that my next cake pop characters may be Ninjago! Would love to see your Ninjago Cake Pops!! A 🙂
This cake looks great! I've just had a request for a Ninjago cake, and I'm starting my research because I'd never heard of Ninjago. I'm really impressed!
I usually make my own Marshmallow Fondant, also, but I'd love a white chocolate recipe, if you have the time to share.
Exactly what I was looking for! Thanks SO much!! If you could share the marshmallow white chocolate fondant recipe that would be awesome. Always looking for tasty, easy to work with fondant recipes. 🙂
Thank you for the inspiration for the Ninjago cake! We had a party for my son in October that was Lego Ninjago. I shared my cake on my blog and linked back to your cake as my inspiration! Have a great week. 🙂 http://www.laurascraftylife.com/2013/01/ninjago-cake.html
Hi – did you make a single or double layer cake? Thanks.
It was a double cake.
What did you use to make the backboards?
It's a Graham Cracker. Melt some white canned frosting and dip the graham cracker into it. Allow it to dip off smooth and set it aside to dry. Then with a red "frosting pen" add in the red details. The Link to Hoosier Homemade has full instructions. http://hoosierhomemade.com/march-madness-cupcakes-cupcake-tuesday/
Hi Karyn,
I just wanted a say a big thankyou. I followed your step by step instructions and made a very cool red ninjago cake for my son's 6th birthday cake. You used great pics. It was my firsy time using rolled fondant and a success! If you would like to see a photo I would be more than happy to send you one
Lees
Hi Karyn,
How did you make the eyes and eyebrows?
And, yes, Lees — please share!!
Alley
i would love your marshmallow fondant recipe!
thanks
[email protected]
Ive never made fondant before, I would love the recipe you used and shall cross my fingers that making it look like fabric is not as hard as it looks! Can you send the recipe for all the bits and pieces?
Thanks!! Lisa
[email protected]
Thank you so much for sharing your detailed instructions. Like others, I used your ideas as inspiration for my own green Ninjago cake for my son's 6th birthday party. He loved it! It was my first time working with fondant and I REALLY appreciated the explanations, instructions, and pictures you provided. Thank you!
This looks great, I am definitely going to try the ninjago cake for my son’s birthday. I am planning on making a regular Victoria sponge cake. Would this hold the weight of the fondant do you know? I’ve just starting using rolled fondant and it worked well on the last Victoria sponge I made however the ninjago cake has extra layers of fondant so am hoping it won’t collapse? Would like to keep to my recipe if possible rather than making a denser cake but want to be sure first it won’t collapse. Please let me know what you think. Many thanks!
I’m not 100% familiar with that type of cake, but if you make the fondant thin, it makes it easier to drape over the cake. The fondant isn’t pressed into the sides, and yes, there are two layers, you can use a small yellow portion for the face and then drape the green over it. Please share your cake with me on FB! Good Luck and Happy Birthday to your son!
Great thanks! I am making it in about a week’s time so fingers crossed it will turn out well. Thanks for your tips!
Thank you for your step by step Ninjago cake. So easy to follow, I created Jay for the birthday boy & matching cake pops.
Sp glad it was helpful! I hope he loved it!