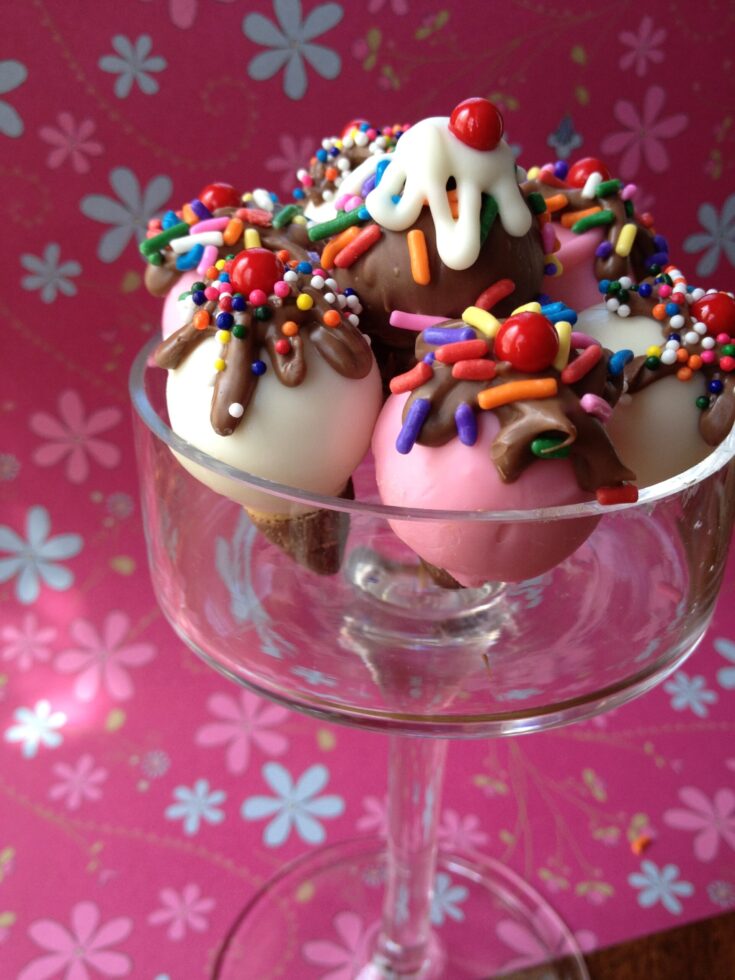
I first made these mini Ice Cream cones for my daughter’s 5th birthday over a year and a half ago. I think that they are so cute and so much easier than cutting full-sized cones in half to get the right fit.
For my Little Cup’s Birthday, we had a very last-minute Ice Cream Party (in February) and these were made as little thank-you favors for all the little girls. The girls loved them! These minis were the perfect size for the little hands.
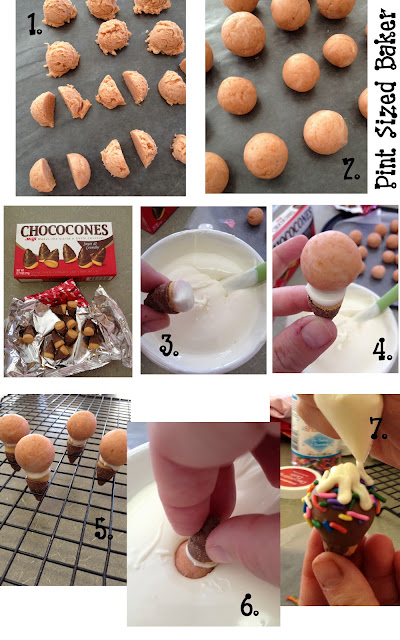
To make these little buggers, make your cake pop batter and then make small cake balls. I measured out regular-size pops and then cut them in half.
Roll them smooth.
I used Chococones as the bases.
Have you seen these little candies?? They are little cookies dipped in chocolate. I love them!
Dip the flat side of the cone and attach the cake ball.
My cooling rack worked perfectly to hold the cones upright while I worked.
Dip the pop and then decorate.
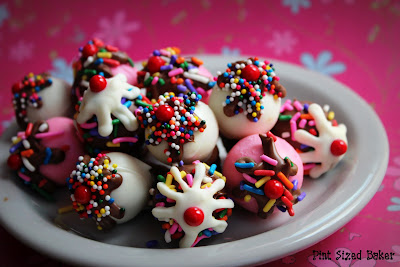
I adding some “toppings” to my cones with some faux chocolate and marshmallow with sprinkles and a cherry on top.
Didn’t they turn out perfect??
My Little Cup thought they did! She was a great help in the kitchen today. She even helped to take some pictures for me.
I think the pops were the perfect reward for her.
Mini Ice Cream Cone Cake Pops
Ingredients
For the Cake Batter
- 1/4 of a 9×13 cake, cooked
- 1 Tbls frosting
For the Pops
- 1 box Chococones
- 1/2 bag of White Candy Melts
- 1/2 bag of Pink Candy Melts
- 1/2 bag of Chocolate Candy Melts
- Sprinkles
- Red Candy (mini M&M or Red Hot)
Instructions
For the Cake Pop Batter
- Combine Cake and Frosting in a mixer and combine. All frosting should be incorporated and the cake should be thick and clump together.
- Step 1. Form balls with cookie scoop and then cut them in HALF.
- Step 2. Roll the balls smooth and place them in the fridge while you melt your candy.
- You should have up to 24 mini cake balls.
To dip the Pop
- Melt your candy according to the instruction, being careful not to get it too hot.
- Open your box of Chococones. You might not have enough to make all of your cake balls, but you can always recombine them and dip some regular pops as well.
- Add a drop of melted chocolate to the flat side of the cone.
- Attach a small cake ball.
- Allow the candy to harden. My cooling rack is the perfect size to stand up these mini cones in.
- Once all the pops are attached to the cones, dip them into the candy. You can add some sprinkles to the wet candy now, or wait to add them. It’s up to you. I added the jimmies to the chocolate cones prior to adding the white topping.
- Place some white candy and chocolate candy into separate baggies and cut a small hole in the corner. Pipe out a star shape on top of the cone and decorate. On the white and pink cones, I added the sprinkles to the topping then added a red “cherry” on top.
- Stand them up and allow them to completely dry.
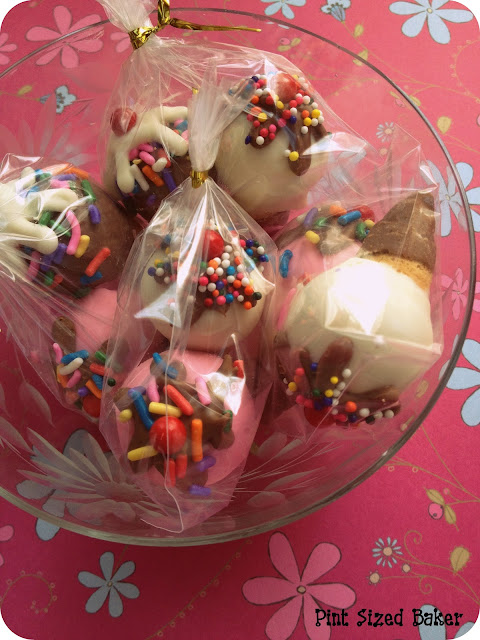
- Bag them up pretty to place into school lunches as a special treat.
Images, text and all other content Copyrighted©Karyn Granrud, Susanne Queck and Wunderlander Verlag LLC, or ©Pro Stock Media via Canva.com. Unlicensed republishing permitted. As an Amazon affiliate, we earn on qualified purchases.

LOL, great minds think alike! I found some mini cake cones recently and I had a very similar idea! You totally have more attention to detail and better pics than me though. Nice work!
Jess @
http://tupelocreative.blogspot.com/2012/08/cake-cones-and-drumsticks.html
Thanks for stopping by!
Very cute! Great idea for my sons birthday!
They made a great party favor! Happy Birthday!
You are the queen of cake pops! These are adorable and I'm lovin the Chococones!
love, love, love – what an adorable idea!
Thanks so much.
I love these, they look so good! My little ones would love something like this, thanks for sharing!
Thanks for stopping by. Everyone loves them 🙂
Those are adorable. Thanks for linking the recipe to our Foodie Friends Friday link party. Dawn from @Spatulas On Parade
OH. MY. GOODNESS. These are the cutest things EVER, Karyn!! Probably one of my fave cakepops I've seen yet 🙂 I love those chococones and need to find some ASAP.
Thanks, Hayley. These may be cute, but your dog is cuter! Woof!
So, so cute! And tiny! Why is it that tiny things are always so cute?
These are super cute!
Cute idea! I would love for you link this up at my first LINK PARTY!
http://www.thecreativeorchard.blogspot.com/2012/08/tutorial-link-party.html
Thanks for the invite. I just linked up!
These are so darn cute! I don't know if I've ever seen those little cones before. Now I'm on a search!
These are adorable!! Very clever! Found you through a linky party and would love to have you share these with my readers at http://www.thetaylor-house.com, Taylor house Thursday linky party.
ok those are the cutest little things! I came over from Stonegable link up and I'm excited to see what else you have coming up! I am always in need of new recipes
Oh Karyn, they are wonderful! I want to eat some up!
Thanks so much for sharing this at The DIY Dreamer.. From Dream To Reality!
I love it! Thank you so much for posting on Saturday Show and Tell. I hope you'll be back this week to link up some more great ideas! Have a great rest of the week!
-Mackenzie
http://www.cheeriosandlattes.com
Those are unbelievably adorable! I haven't seen choco cones but I'll be on the lookout for them now!
These are absolutely adorable. I am most definitely making these. WOW!
http://throughbetsyslookingglass.blogspot.com
Your little one is just precious with those awesome Cake Pop's, these pops are really special!
Hope you have a great weekend and thank you so much for sharing with Full Plate Thursday.
Come Back Soon!
Miz Helen
Thanks for linking up at the Create & Inspire Party! We will be featuring YOU tonight! Be sure to stop by and link up more fabulous projects!
xo,
Kimberly
anightowlblog.com
These are just too cute!!!
Thanks for sharing with my Super Link Party! 🙂
I LOVE these – I have such a love/hate relationship with cake pops – I love to look at them, but I hate to make them….I hate to make them because I'm no good at making them 😛
I would love to invite you to post this over at my link party on The Purple Pumpkin Blog! Hope to see you there 🙂
My 7-year-old is going to love these! I've pinned them on Pinterest so that I have the recipe when her birthday comes around.
Just wanted to invite you to come link up with Frugal Food Thursday at Frugal Follies! Hope to see you there!
They look wonderful and I bet they tasted it too!
Those are so very cute!!! perfect for little hands to hold…what am I saying? I want to hold like 6 of them for myself:-)
These are adorable. I made something similar last year and my girls loved them!! Thanks so much for linking up to Tasty Thursdays on The Mandatory Mooch!! I hope you will link up again. The party will be live tonight. http://www.mandatorymooch.blogspot.com
Thanks, Nichi
Karyn,
These are Adorable! I have never seen those Chococones, where did you get them? Thanks so much for linking up your amazing creations each week. Have a great week.
Michelle
These are so cute and the recipe looks great. Thank you so much for sharing with Wednesdays Adorned From Above Link Party last week. This weeks Link Party is opened at
http://www.adornedfromabove.com/2012/09/reeses-smore-brownies-and-wednesdays.html
from Wednesday until Sunday.
Hope to see you there.
Debi Bolocofsky
Adorned From Above
http://www.adornedfromabove.com
One of my most favorite designs
They are so pretty, Karyn! Just goes to show that you can be hugely creative with the cake pop basics. Bookmarked, tweeted, and tat tipped over at OCP, as ever: Ice Cream Cake Pops! 🙂
Kate.
Very cute!! They will make a huge impact on the guests. Funtique Parties is also a great resource if you're looking for help planning a birthday party.