Learn how to simply crumb coat a layer cake to impress. This basic foundation is not as hard as you might think. Follow our step-by-step tutorial.

Is crumb coat the same as frosting?
A crumb coat and frosting are two important elements in cake decoration. While a crumb coat has a functional role, a frosting is aimed at bringing taste and visual appeal to a cake.
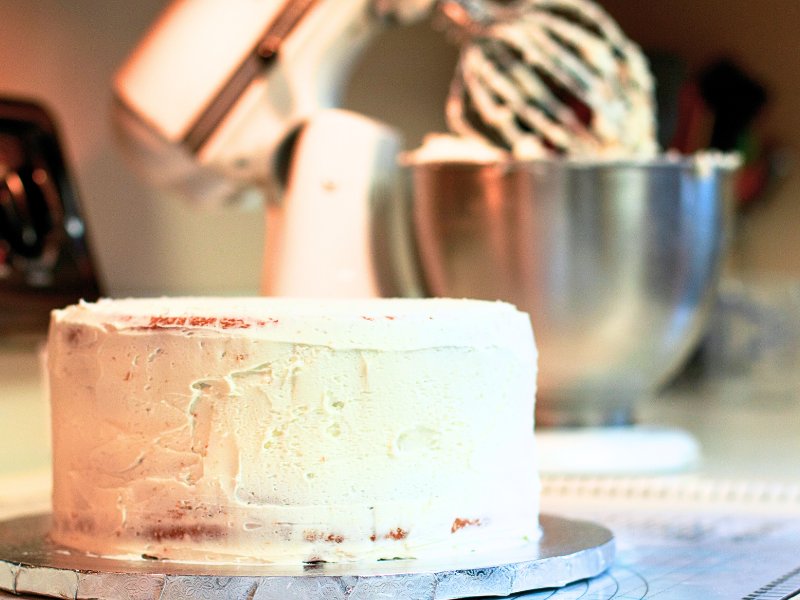
- A crumb coat is a very thin layer of icing that is meant to seal in the cake’s moisture. It creates the base for the final decorative frosting and toppings.
By using a crumb coat, bakers ensure that any loose crumbs on the cake’s surface are prevented from disturbing the finished cake design. - Frosting serves as the flavorful and visually appealing layer that’s spread or piped onto the cake.

Does a cake to be chilled before crumb coating?
For a layer cake with a lot of frosting between the layers, it is essential to cool it before coating. Place it in the refrigerator for minimum 30 minutes (or up to 2 hours).
This allows the frosting to cool and firm up. This step makes sure, the upper layer won’t shift while applying the crumb coat.
Check out the other Baking Techniques and Basic Recipes.
Ingredients
- 1 3 Layers Yellow Cake
- 1 cup unsalted Butter 2 sticks
- ½ cup Shortening
- 1 ½ pounds Powdered Sugar
- 1 tablespoon Meringue Powder
- 2 teaspoons Vanilla Extract Clear
- 6 tablespoons Milk
Step by Step
- The first step to making a decorated cake, is to bake a cake. You can make, for example, 3 layer yellow cake from scratch or a box. Bake and cool your cake. Wrap in plastic and cool the cake for minimum 1 hour, better 2.
- Make sure you cut off the edges before applying frosting and crumb coating. It is importsant that layer cakes are the same size, or conical, if you go for that look.
- Prepare your buttercream: Mix the soft butter and shortening on medium speed until smooth and blended. Gradually add in the powdered sugar, meringue, and vanilla. Add the milk as needed to smooth the frosting and thin it your desired consistency.
- Now add a bit of frosting to your cake board and place your first layer of cake down. This will secure the cake to the board.
- Add a thick layer of frosting and smooth it over, using a large piping bag and a cake icer tip to add the frosting. Add the second layer and repeat.
- If you did not blind bake or cut your cake layers, place the top cake layer on upside down so that the top of the cake is flat.
- Add a thick layer of frosting to the top of the cake and push it over the edges.
- Press the frosting into the sides of the cake and then smooth out the top and sides. Having a turntable cake stand makes this task a lot easier.
- Make it as smooth as you can. This buttercream will crust over a bit making it easy to use a paper towel to smooth out any edges later.
- Make sure, the cake is fully crumb coated and ready for the next step! Good job, you!
Images, text and all other content Copyrighted©Karyn Granrud, Susanne Queck and Wunderlander Verlag LLC, or ©Pro Stock Media via Canva.com. Unlicensed republishing permitted. As an Amazon affiliate, we earn on qualified purchases.