Hi all… I can’t believe this week has flown by and now it’s almost 5pm on Thursday night and I have not put together a post for tonight. YIKES!!
I’ve been busy most of my days and my evenings have been completely taken over by the Online BlogCon Group on FB. The ladies participating are wonderful. Everyone has been so helpful and I’ve learned some new things. There have been a lot of fun giveaways and sure do hope I win something 🙂
On Saturday, I’m teaching my first Cake Pop Class here is Charles Town, WV and I am a bit nervous.
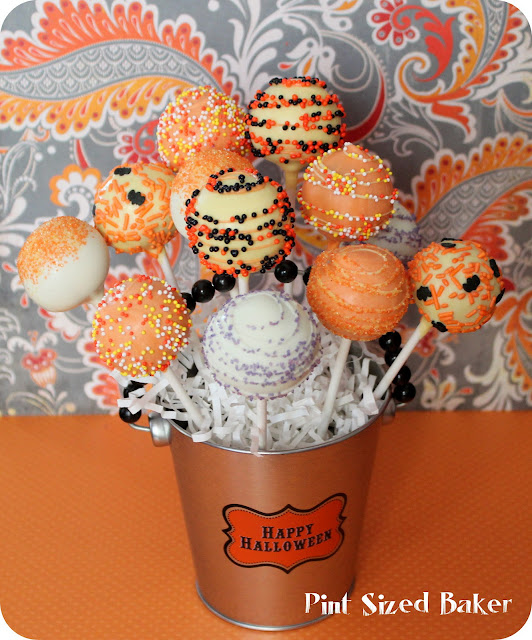
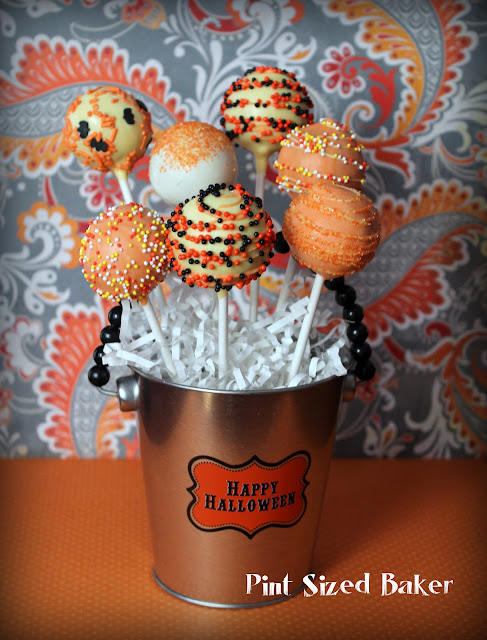
I am bringing these fun Halloween and Fall Inspired Cake Pops to use as my example.
Today, I’m going to share some of my Cake Pop tips with you (because, I know ya’ll don’t live near me and you’re totally jealous that you can’t participate in the class with me).
TIP 1. Have ALL your decorations ready to go. Get the sprinkles and candy ready to go. Make sure you have enough of everything and get them set up and ready to attach.
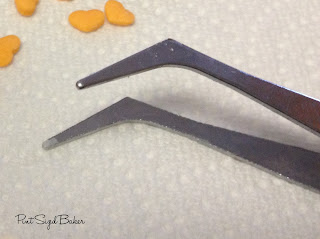
TIP 2. Have the right TOOLS. One of my favorite tools is an offset tweezers. These are great for picking up small pieces of candy and adding them to the cake pop without getting your fingers into it.
TIP 3. I like to use a COLD cake and COLD frosting to make my cake balls. One of the questions I get asked the most is “How do you get your cake pops so round?” I think that using cold cake and frosting and mixing it in my Kitchen Aid with a paddle attachment is the key to making good cake pop batter. Using cake and frosting that is already cold allows me to not have to refrigerate them very long.
I DO NOT mix by hand. It stays lumpy and does not get smooth. The frosting never gets fully incorporated into the cake.
Tip 4. Proper amount of Frosting to Cake Ratio. I’m sorry, but there is NO secret measurement. I hate telling people to use X amount of frosting. The frosting is a binder and the binder is dependant on how moist your cake is. Most box cake mixes are very, very moist – especially chocolate. If you use less oil or substitute it with applesauce, your cakes moisture will be different. I know Cake Poppers who roll ONLY warm cake because of the moisture in the cakes.
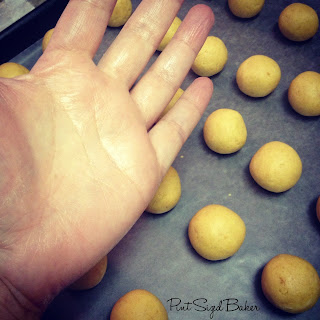
The best advice I can give you is to mix with a mixer and judge the moisture by the residue on your hands when you roll the pops. I rolled 3 dozen cake pops in the picture below and my hands were clean!
Yes, I’ll have some red residue after rolling Red Velvet cake pops and some brown after rolling chocolate cake pops, but my hands are not sticky and coated with frosting. If yours are, you’ve used too much frosting. Go back and add more cake.
Tip 5. Start of small! If this is your first time making cake pops, start with 1/4 of your cake and a tablespoon of frosting. You should get 12 cake pops. If you need to adjust your cake to frosting ratio, you have leftover cake and extra frosting so if you play around, you can.
TIP 6. Use a Cookie Scoop to measure cake pops equally each time. I Love my Norpro Cookie Scoop. It is all metal and easy to clean. I’ve had no problems with it. I find that if I use my Norpro Cookie scoop my cake pops are are the same size and they are already 75% rolled.
The Wilton Cookie scoop is a bit larger, but for $3 you can’t go wrong.
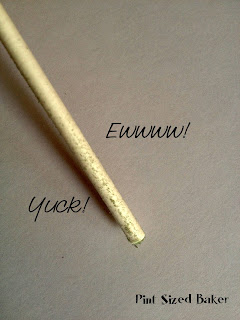
Tip 7. Don’t use Green Florist Foam. I used to. It works. It’s inexpensive at the craft store.
However, it leaves an ugly green film on your cake pop sticks. YUCK!
You’re better off using real Styrofoam if you are going to just make pops once or twice. I’ve even just used a juice cup to hold my cake pops. If you don’t have either, make “candy apple style” cake pops.
My suggestion is to invest in cake pop stand. You can make your own a few different ways, but if you or your husband isn’t good with tools, order a nice
Cake Pop Stand by KC Bakes or find a seller on
Etsy.comNow, I know you are going to ask about melting Candy Melts… and dipping them.
That’s a post for another day.
I hope I have answers some of your questions. Please let me know if you have any trouble making your cake pop batter and rolling your cake balls.
I link up at THESE GREAT parties!
This post was Featured at:
Images, text and all other content Copyrighted©Karyn Granrud, Susanne Queck and Wunderlander Verlag LLC, or ©Pro Stock Media via Canva.com. Unlicensed republishing permitted. As an Amazon affiliate, we earn on qualified purchases.

.jpg)






Great tips! I'm learning the lesson about not using that ugly green foam. Gotta get me a cake pop stand!
These are great tips, Karyn! I'm usually not a fan of cake pops since mine inevitably turn out lumpy and weird looking–hence why I liked my zombie ones so much since I could work with the lumpy imperfections 🙂 however these tips are ones I hadn't heard before and are useful!! Thank you!
Your Zombies were great! I would not be able to make them disfigured enough to be convincing.
The next time you do a class, you'll have to let me know. 🙂 I'd love to come!!
Dec 1 and 15. Snowmen and Christmas Trees. I'll let you know when it gets posted.
Here it is! http://www.craftworksatcoolspring.org/register-for-classes?eventId=543360&EventViewMode=EventDetails
Please bring some friends. And then we can go get Limoncello!
I don't get candy melts here in India. One of the reasons I never attempted cake pops – though I'm dying to try it. Can you please tell me a substitute (baking chocolate?) and how I'd go about using it?
You can use basic Chocolate Chips or chocolate bars. Don't use unsweetened chocolate. Melt the chocolate slowly and temper it. http://sweets.seriouseats.com/2010/03/how-to-temper-chocolate.html This has great information on tempering chocolate.
Great tips! Your cake pops look so good. Cookie scoops seem to be great for just about anything!
Love it! I needed this, have never make cake pops I have been asked, so I need to get on this!
Thank you so much for the tips! I am not going to lie, I am a little jealous of your perfect pops!
-Steph
Well, thanks so much. The key to great pops is good batter. If your batter is no good, the pops will not hold shape or dip well.
I am just admiring how smooth and round your pops look~GREAT job! Wish I could go to your class!
Sue, your cake pops are great as well! Thanks for stopping by.
Fantastic–as usual! I have never tried making cake pops. Seeing your posts makes it very tempting! See you (well not really see you. . . but you know what I mean!) at Online Blogcon.
Heidi at OneCreativeMommy.com.
I just found your blog at sweet boutique! Now following, I would love for you to come link it up at I Freakin' did it Friday! http://www.missinformationblog.com/2012/10/i-freakin-did-it-friday-11.html#more
Your cake pops look awesome – I wish I didn't have such a love/hate relationship with them, I am sure I would make more then!!
I would love to invite you to post this over at my link party on The Purple Pumpkin Blog! Hope to see you there 🙂
Michelle xoxo
Great tips. I have yet to make cake pops some I'm loving all these tips. Can't wait for the next post and then to get into the kitchen and make some of these bad boys!
-Lisa.
Sweet 2 Eat Baking
Great tip! I like the idea of using cold cake and cold frosting. Thanks for sharing.
I have never make cake pops… your's are just beautiful!!!!! Thanks for sharing these great tips and your pretty pops at ON THE MENU MONDAY!
Thank you for sharing these tips!! I make cake pops all the time and have never tried using my mixer to blend the frosting with the cake…I can't wait to try it. And, I am now going to be waiting to read how you dip yours to look so good!
http://mommysordinarymagic.blogspot.com
I am looking forward to getting a cake pops kit for Christmas – I can't wait to have a go with them!
Sarah @ A Cat-Like Cusiosity
I love this. Please link it to my linky party & anything else you have to share. It just went live a little early 🙂 Thanks, Peggy. http://diycraftyprojects.com/2012/10/whatcha-work-up-wednesday-5-linky-parties-are-back.html
These are so cute! You are so talented! Thanks for sharing at Keep Calm and Link Up!
Barbara at Chase the Star
chasethestar dot net
Great tips, cake balls are tricky! Would love it if you linked up on my blog hop http://www.w-t-fab.com/search/label/bloghop. Also let me know if you'd like to follow each other!
great info, I love my new stand and wish I had it years ago.
These are awesome treats for the Spooks! Have a fabulous weekend and thank you so much for sharing with Full Plate Thursday.
Come Back Soon!
Miz Helen
These are wonderful tips Karyn. I only tried making cake pops once and it was a disaster! I will now try them again 🙂 Thanks so much for linking up to Creative Thursday. Can’t wait to see what you share this week! Have a wonderful week.
Michelle
These are really cute! I hope your cake pop class went well.
throughbetsyslookingglass.blogspot.com
Good to know you had a busy and productive week. Those cake tops are so cute and yummy. Thanks for the tips.