I think that I am the luckiest Mom in the States!!
Wanna know why??
Because my kid doesn’t start school until SEPTEMBER 8th!!
AND… There is only like 4 things on her Back to School Shopping List!
I can’t believe it!
She is starting a new school for first grade and I thought she would start the day after Labor Day.
However, today, we got an e-mail that school starts on the 8th!
I can’t believe it!
To celebrate my freedom from my 6 year old going back to school I made some simple Apple Cake Pops that I know you can make!
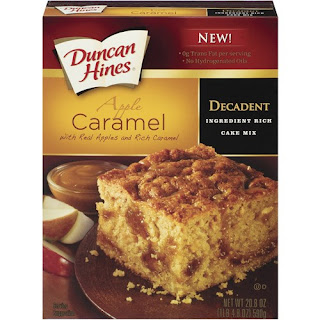
I started off with the Apple Caramel Cake and baked it in a 9×13 pan. There is no need to be fancy with it. You’re just going to crumble it up anyway.
Once the cake is baked and cooled, I crumbled it up and added a large spoonful of vanilla frosting. Combine it with a paddle attachment with your mixer and you’re good to go.
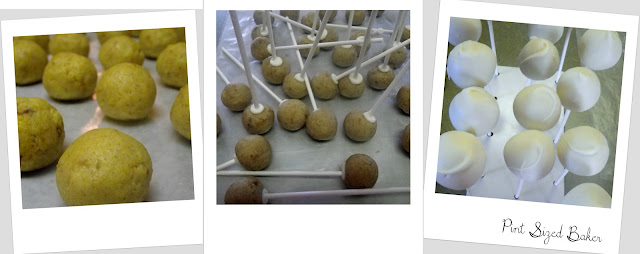
Measure out your balls and roll smooth. I usually get 36 – 40 cake balls from an entire cake box mix.
**NOTE** A good way to know if you used too much frosting is to see how sticky your hands are when you are rolling the cake balls. My hands stay 99% clean of cake and frosting. If your hands are covered in cake, you’ve used too much frosting.
Pop them in the fridge to chill and firm up.
Melt you candy melts. I went with white to show off the bright red apple. You can pick school colors for a fun color variation.
Attach the sticks by dipping a 1/2 inch of the stick into the melted candy and then inserting it halfway into the cake ball. When I’m making a lot of pops, they end up all over my cookie sheet.
Place 30 pops back into the fridge and only keep out 10 to dip first.
When you work in batches of 10 (or 12) your pops won’t warm up too much.
There is a fine line for your cake pops to be too cold or too warm. Too cold, and you risk your cake pops cracking. Too warm and the cake will fall off your stick.
I’ve even only pulled out 3 – 4 pops at a time from the fridge to dip during the summer. Just figure out what works best for you.
When all of your pops are dipped, it’s time to punch out the apples.
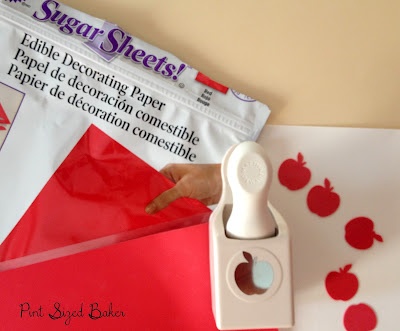
I used Wilton’s Sugar Sheets in Red and a Martha Stewart apple punch from the craft store.
Simply punch out the apples from the sugar sheets and set them aside.
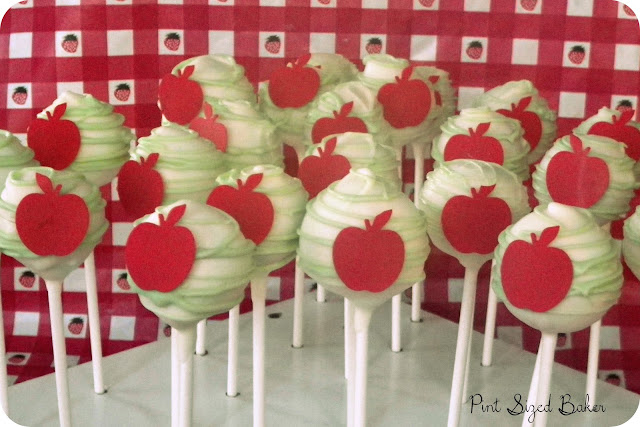
I added some very light green swirls to the pops and then attached the apple shape to the wet candy.
You’re Done!
Well… sort of… Wrap them up and send them off with your kid to school.
If your school doesn’t allow for outside snacks, the teachers and administrators would LOVE to have some of these cake pops!
As for my kid, I still have a month of her at home driving me crazy.
Maybe I’m not the luckiest Mom in the States after all…
Images, text and all other content Copyrighted©Karyn Granrud, Susanne Queck and Wunderlander Verlag LLC, or ©Pro Stock Media via Canva.com. Unlicensed republishing permitted. As an Amazon affiliate, we earn on qualified purchases.
.jpg)


.jpg)


They look awesome. Just a neat idea the edible paper, I've never seen that before, but it's so effective.
I've used them before for other projects. Super easy if you don't want to hand mold your pops into a shape.
Those sugar sheets are genius! I'm totally going to have to look into that. And only four supplies? I want to go to your school!
yes! She needs pencils, crayons, paper and a yoga mat. They have once a week! I want to go to school on yoga days!
Karyn, this is so cute! I'm sure kids and teachers alike will appreciate these awesome cake pops. Caramel apple flavor? Yum! And lucky you that your kid not only starts later but has a limited B2S list! Easy peasy year for you, methinks 🙂
Those look great!! Thanks for linking up to Foodie Friends Friday!
They look great! Delicious! Liz
These are soooooo cute and wonderful treats 🙂
And using these sugar-sheet is brilliant., Very creative of you
I have never seen sugar sheets before–these are adorable!!
Shannon@SewSweetCottage
You;ll find them at Micheal's, Hobby Lobby, and even Wal-Mart. They have a lot of differnt colors and patterns. They are so easy to use and look great.
These look so yummy – and I'm lovin' using the sugar sheets for the apples – makes life for cake decorating challenged folks like me easier! Found you on Two Saster's link up, and I'm excited to be following you! Hope you can visit soon…
-Heather
stringtownhome.blogspot.com
So easy and a huge time saver! If you're no good at rolling and working with fondant shapes, this is perfect. I have a few paper punches that I use strictly for the sugar sheets.
so cute, I am counting down the days until September and I get so jealous when I hear kids going back already. I love my kid, but man he needs to be back with his friends, I am no good at lego!
My nieces and nephews in Hawaii started school on July 30!! Crazy!! I'm no good at being judge and jury during play date fights. I'm ready to have my house quite for 6 hours in a row!
These look amazing! Thanks for linking up to Foodie Friends Friday! Don’t forget to come back on Sunday to Vote.
I pinned these – adorable!
I would love if you would submit it and share it with my readers! Join the Community and share any of your creative project!
Susan @ Oh My! Creative
Thanks for the pin. Always appreciated.
I have thought many times that I should make cake pops and these look amazing. Thanks for sharing on Foodie Friends Friday!
http://marlys-thisandthat.blogspot.com
These cake pops are sooo cute! Thanks for sharing on Foodie Friends Friday! Don't forget to come back on Sunday to vote for your favorite recipes!
I have seen the sugar sheets at JoAnn's and Michaels and wondered how well they work but never tried them. These pops are just adorable and the apples are the perfect touch. Thanks for sharing at this week's BFF Open House!
The sugar sheets are so easy to use. If you don't want to use a punch, you can always cut them with a scissor. A great way to make sugar cookies without fancy piped out design.
These are super cute and great for back to school. My Get Social Sunday link party is live. Would love to have you come link up your homepage and promote your blog!
http://alivedinhome.blogspot.com/2012/08/get-social-sunday-link-party.html
These are really cute!
Thank you.
I like that editable paper you cut apple shapes with.
http://www.iheartpears.blogspot.com
These are the sweetest!!! Awesome idea! Please come link up at our BACK to SCHOOL Resource Page at http://www.mercyinkblog.com/back-to-school-tips-tricks-tools would love to have these added to our bunch!
blessings,
lauren
Thanks for the invite. I just linked up.
Oh My! So cute and creative! So cute for back to school! I hope you will link up tomorrow to The CSI Project starting tomorrow. The challenge is Back to School Projects. You just might win. Each week is a new challenge with 3 tutorials, giveaway and a fun guest judge.
Come on over!
http://www.thecsiproject.com
Thank you. Just linked up to the competition.
Karyn! So Cute- these Apple Pops are Perfect for Back to School! Love how you used the Apple Cake mix- get out, I didn't even know they made that! Looks Fantastic! Found you over at the CSI Project, thank you for sharing this!!!
Jen
Found you on CSI and I LOVE this idea!!!! So simple yet so cute!
pippa
http://www.shopwithpippa.com
Thank you for linking these up at the party! I'm featuring them this morning…stop on over in an hour or so!
Melanie
Reasons To Skip The Housework
Hope you are having a great weekend and thank you so much for sharing your awesome recipe with Full Plate Thursday.
Come Back Soon!
Miz Helen
Oh these look so cute! I would love for you to share them at my link party going on now:
http://thewinthropchronicles.blogspot.com/2012/08/share-it-link-party-25.html
Your blog is very informative. WLCI school of advertising and graphic designing offers programmes & courses for graduates and undergraduates students.
Design Course
Institute for Design
Love these cake pops!