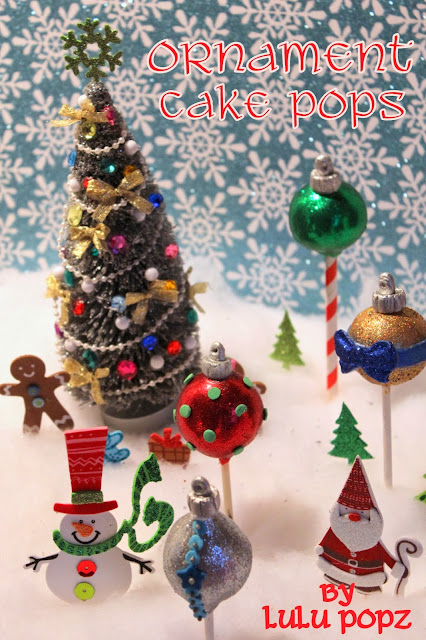
I think that these Christmas Ornaments Cake Pops look so cute and are a great treat for the holidays! I love the way Lulu Popz makes them!
Today I have a special guest post for you. Crystal from Lulu Popz created these amazing Ornament Cake Pops for you. I love them!
Hello Pint Sized Baker Fans! I’m Crystal from Lulu Popz and I’m a home based baker of whimsical confections and yummy goodness! Everything is made with organic imagination, and the highest quality of love!
I offer cakes, cupcakes, cookies, french macarons, cake pops, pies, chocolate dipped everything, and more! Please stop by my website to view all of my treats.
Tinsel and garland and ornaments, OH MY! I don’t know about you, but I’m usually up to my elbows decking the halls and roasting chestnuts, so I decided for my holiday pops I would keep it simple and sweet – with a ball ornament assortment!
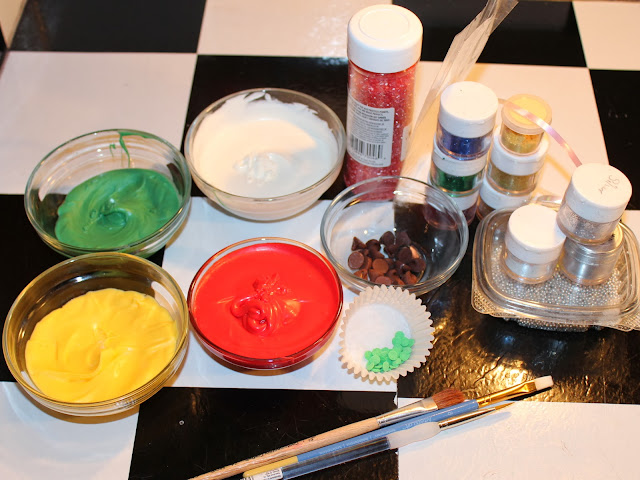
Materials needed:
- Box of cake mix
- Jar of frosting
- 6” Lollipop Sticks
- Candy wafers
- Heat proof bowls
- Fondant
- Toothpick
- Luster Dust
- Paintbrush
- Vodka
Optional:
- Disco Dust
- Water
- Paintbrush
- Chocolate Chips (for points of silver bell, or pointed ornament shape)
- Quins (flat circle sprinkles)
- Optional decoration suggestions (sprinkles, cut outs, sugar decos, ect)
To begin, bake, cool, crumble, and mix your frosting as you would with any cake pop. Freeze the balls overnight, and then I used round pops for my ornament balls, but feel free to be creative with a bell shape, candy cane shape, anything you can think of! Here I am showing you how I formed the bell shape (I did not get a picture of this finished Bell cake pop, as my dog ate it during photographing, seriously!! Bad dog! *gt;@<).
Melt your candy wafers in the heat proof bowl in the microwave 15-30 second intervals, stirring in between. Sometimes I can get away with one minute of heating – but sometimes a minute 15 seconds is good, but monitor your chocolate so it does not burn. Dip your stick into the melted candy a little, and then plunge it into the stick half way. Once this dries, you’re ready to dip!
Dip your pop into the melted candy wafers, and spin to coat. I’ve made it a habit to hold the stick with one hand, and tap the back of that hand with the other to shake off the excess chocolate. Stick these in a piece of Styrofoam to set.
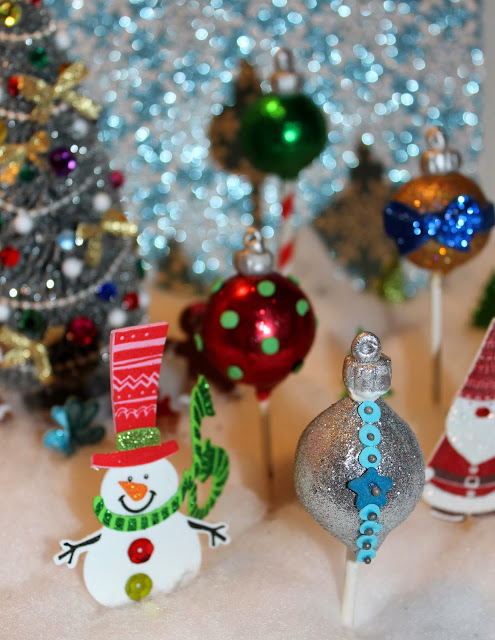
To make the top parts of the ornaments, the band and the bow on the gold pop – you will need a small ball of fondant. For the gold pop design, I used the Wilton mold, and a ½ inch strip of fondant, adhered to the pop with a small bead of chocolate. To make the top ornament section – I took a small piece of fondant (the size of a dime), and pressed my thumb on it lightly to flatten it to a thick disc shape. I then took my toothpick and began indenting the sides of it to form the edges of the ornament top. To make the eye, I took a small ball of fondant the size of a pea and put a hole into it with the toothpick, working it around the fondant slightly to open the hole. I attached eye to lid with a dab of water, and painted both with silver luster dust, and set to dry.
Alright, here’s the fun 🙂 Decorate these pops any which way you want! Stripes, swirls, dip half in another color if it tickles your fancy! I opted to glitz mine and grab the trusty disco dust! I learned disco dusting by watching a you tube video made by my friend at Mimi’s CakesYum.
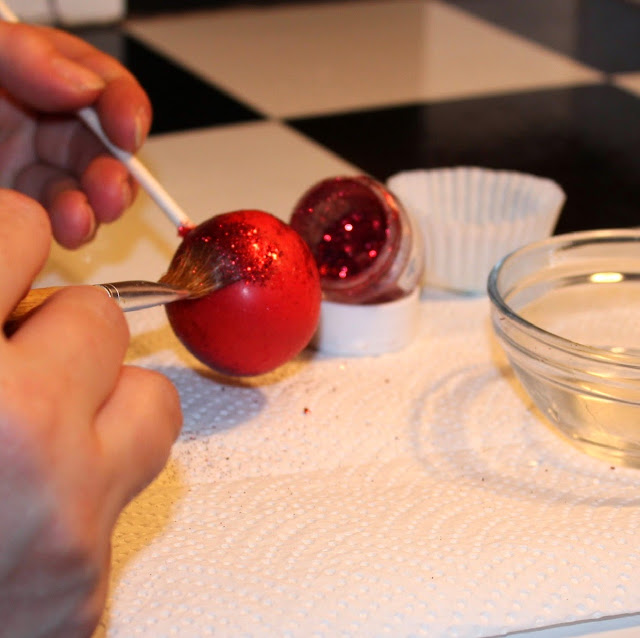
Basically – dab your brush into the water, and brush it onto your set cake pop. Then, dip your brush into the disco dust and paint it on! You may have to go over it with some more water to mush the glitter around.
After coating the entire ball, take a dry brush and brush away the excess dust. – VIOLA!
Decorating your ornaments is really going to be where you can do whatever you want. Draw swirls on them, dust half of them, put stripes with some chocolate, or leave it as is.
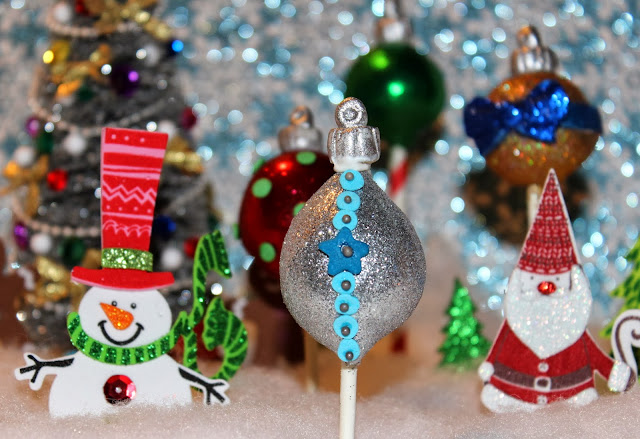
For the silver ornament pictured – I used a round cake pop, and glued two chocolate chips to the top with some of the candy melt. After it dried, I then dipped and let it set.
And that my poppers – is the long and short of it!
Christmas Ornaments Cake Pops
Recipe Type: Cake Pops
Author:
Prep time:
Total time:
Serves: 12
I think that these Christmas Ornaments Cake Pops look so cute and are a great treat for the holidays! I love the way Lulu Popz makes them!
Ingredients
- 1/4 of a 9×13 sheet cake
- 1 – 3 Tbsp frosting
- 6” Lollipop Sticks
- Candy wafers – varios colors
- Heat proof bowls
- Fondant
- Toothpick
- [url href=”http://amzn.to/2iNurr1″ target=”_blank”]Luster Dust[/url]
- Paintbrush
- Vodka
- Optional:
- [url href=”http://amzn.to/2iqrNuL” target=”_blank”]Disco Dust[/url]
- Water
- Paintbrush
- Chocolate Chips (for points of silver bell, or pointed ornament shape)
- Quins (flat circle sprinkles)
- Optional decoration suggestions (sprinkles, cut outs, sugar decos, ect)
Instructions
- To begin, bake, cool, crumble, and mix your frosting as you would with any cake pop. Freeze the balls overnight, and then I used round pops for my ornament balls, but feel free to be creative with a bell shape, candy cane shape, anything you can think of! Here I am showing you how I formed the bell shape.
- Melt your candy wafers in the heat proof bowl in the microwave 15-30 second intervals, stirring in between. Sometimes I can get away with one minute of heating – but sometimes a minute 15 seconds is good, but monitor your chocolate so it does not burn. Dip your stick into the melted candy a little, and then plunge it into the stick half way. Once this dries, you’re ready to dip!
- Dip your pop into the melted candy wafers, and spin to coat. I’ve made it a habit to hold the stick with one hand, and tap the back of that hand with the other to shake off the excess chocolate. Stick these in a piece of Styrofoam to set.
- To make the top parts of the ornaments, the band and the bow on the gold pop – you will need a small ball of fondant. For the gold pop design, I used the Wilton mold, and a ½ inch strip of fondant, adhered to the pop with a small bead of chocolate. To make the top ornament section – I took a small piece of fondant (the size of a dime), and pressed my thumb on it lightly to flatten it to a thick disc shape. I then took my toothpick and began indenting the sides of it to form the edges of the ornament top. To make the eye, I took a small ball of fondant the size of a pea and put a hole into it with the toothpick, working it around the fondant slightly to open the hole. I attached eye to lid with a dab of water, and painted both with silver luster dust, and set to dry.
- Decorate these pops any which way you want! Stripes, swirls, dip half in another color if it tickles your fancy! I opted to glitz mine and grab the trusty disco dust!
- To do this, dab your brush into the water, and brush it onto your set cake pop. Then, dip your brush into the disco dust and paint it on! You may have to go over it with some more water to mush the glitter around.
- After coating the entire ball, take a dry brush and brush away the excess dust.
Thanks so much Crystal for this amazing Cake Pop Tutorial! I love the shimmer cake pops. I need to make them sometime.
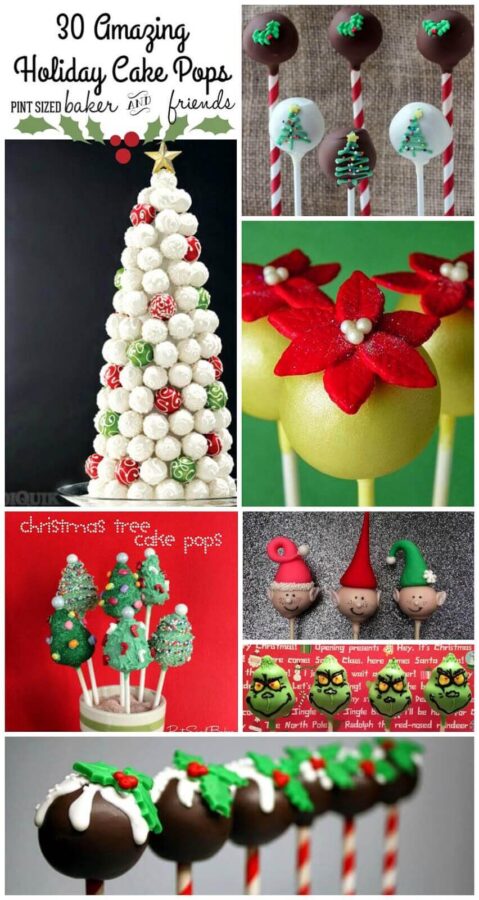
Here’s a few more Cake Pop tutorials for ya!
Images, text and all other content Copyrighted©Karyn Granrud, Susanne Queck and Wunderlander Verlag LLC, or ©Pro Stock Media via Canva.com. Unlicensed republishing permitted. As an Amazon affiliate, we earn on qualified purchases.
.jpg)
