These easy Easter Sugar Cookies are going to disappear faster than the chocolate eggs. A delicious cookie base and easy instructions make the best cookies!

Cheat with some Premade Royal Icing
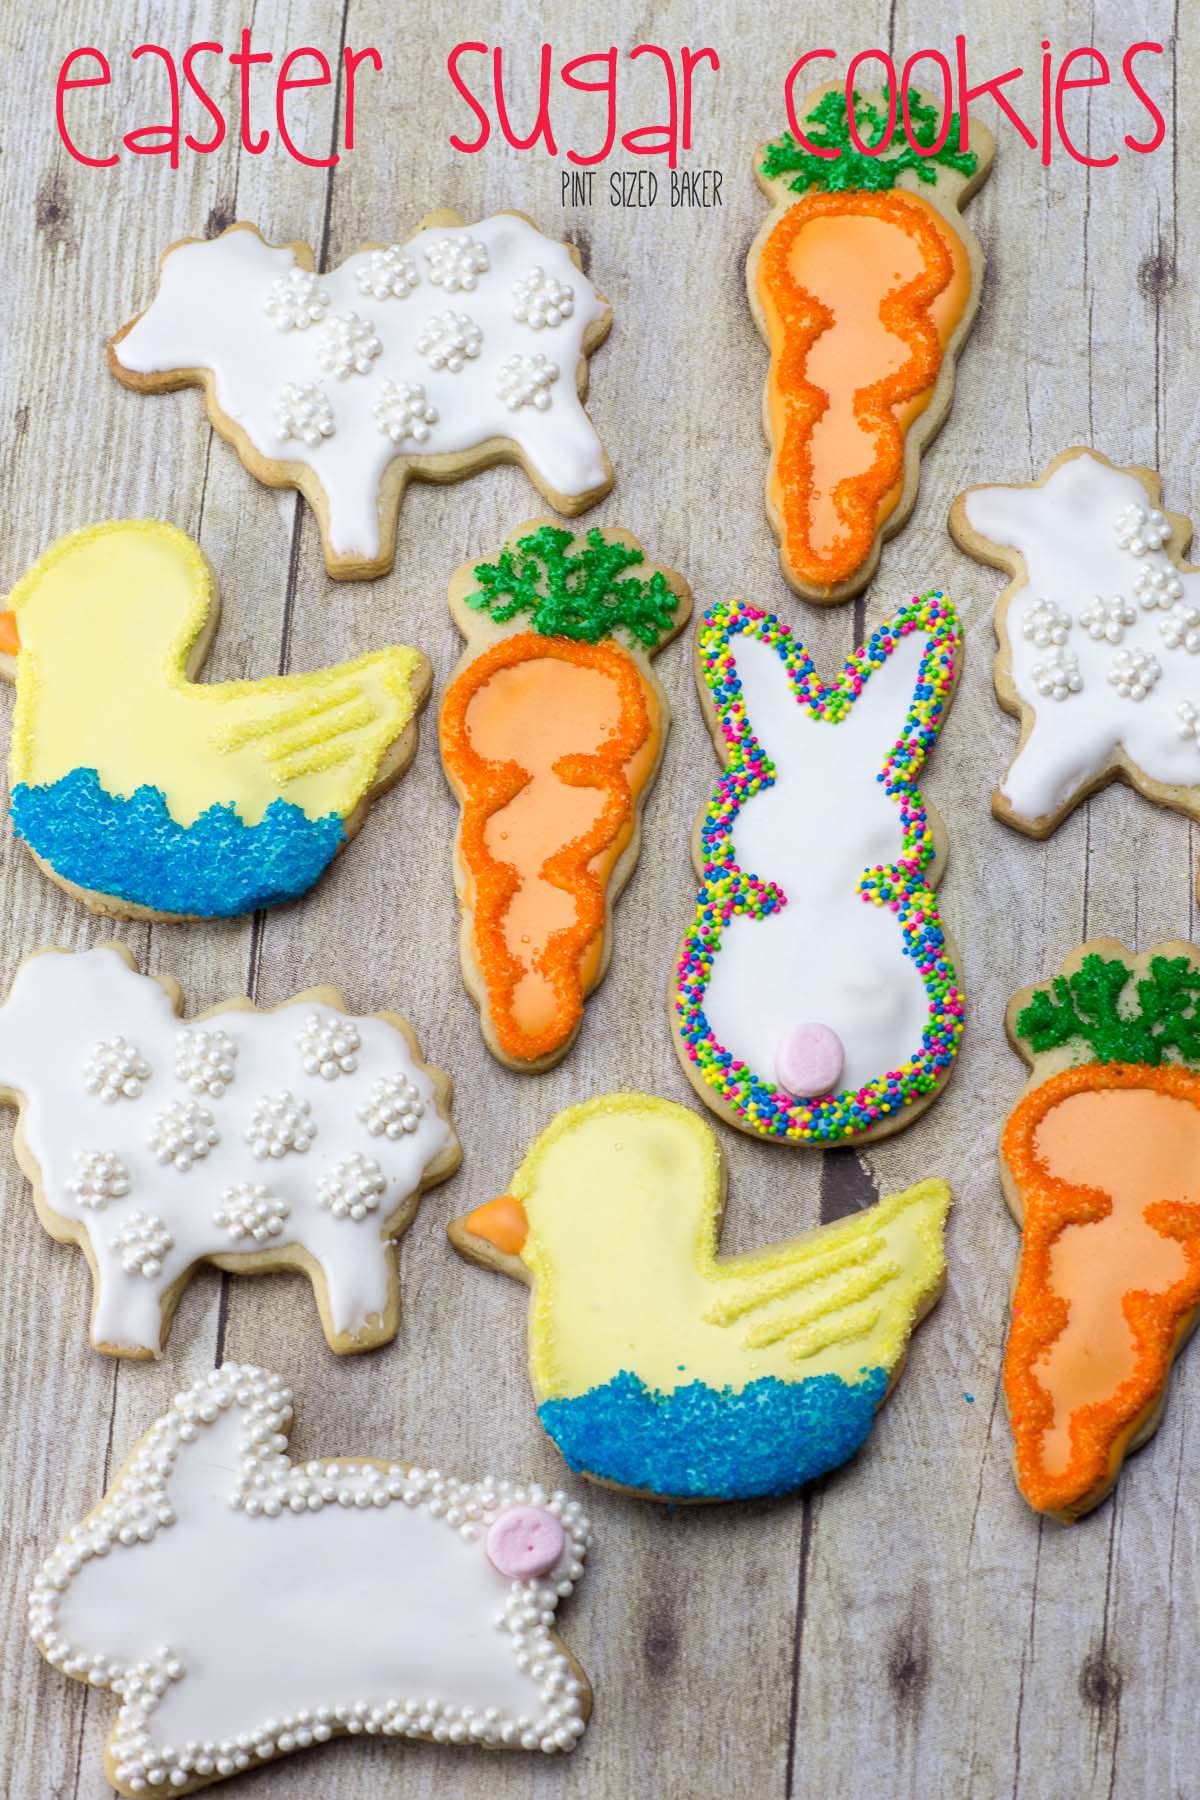
These easy Easter sugar cookies are made with my tried and true sugar cookie recipe and decorated with the cookie ice and sprinkles from Cake Mate. It just makes it so much easier for me and my kid to make amazing cookies!
Using a premade Cookie Icing makes life so much easier – especially when you’re decorating with little ones. To be totally honest, as an adult, I much prefer the ease of using cookie icing to decorate my sugar cookies. No, it’s not the same, but at the end of the day all that matters is that you (and the family) have a fun time decorating the cookies.

These cookies are so fun and easy to make, and they really take no time at all to do. You can bake and decorate on different days. Just store the cookies in an airtight container. They last several days in a container on your counter. You can buy jumbo plastic eggs to place the cookies into for your Easter egg hunt. They are so much better than candy.
Or you can display them on a pretty tray with other desserts for the day. They also pack well to send to school or give as gifts.

Also try my Easter Bunny Macarons or Easy Lemon Jelly Donuts.
Ingredients
- 3 cups all-purpose flour
- 2 tsp baking powder
- 1 cup butter 2 sticks, cold
- 1 cup sugar
- 1 medium egg
- 1 ½ tsp extract flavor of choice Vanilla, Lemon and Almond are my favorites
- Cake Mate Cookie Icing White, Green, Blue
- Food Coloring to make orange and yellow
- Cake Mate Classic Pearls
- Cake Mate Crystals small colored sugar sprinkles in orange, blue, green
- Cake Mate Nonpareils Polka Dots
Step by Step
- Preheat the oven to 350°F (160°C) and line two cookie sheets with parchment paper or silicone mats.
- Mix the flour and baking soda in a bowl and set aside.
- Cut the cold butter into 1-inch bits and mix in a stand mixer with a paddle attachment. Add in the sugar and mix until it’s light and fluffy. Beat in the egg and extract.
- Gradually add in the flour 1 cup at a time until it’s just combined. Scrape down the sides of the bowl. The mixture will be thick and crumbly.
- Transfer the dough to a large piece of plastic wrap. Cover it with a second piece of plastic wrap and press/roll out to ⅛" thickness. Cut out your shapes and place them on to the cookie sheet. Place them into the freezer for 15 minutes, then bake for 9-12 minutes. Cool on the sheet for two minutes then transfer to a cooling rack.
- When all the cookies are baked and cooled, it’s time to decorate.
- Spread a thin layer of your base icing. You can outline the cookie and fill it in or use an offset spatchula to spread it. Allow the cookie icing to completely dry for 2 -3 hours.
- If you are coloring your cookie icing, add some to a bowl and add just a drop of the food coloring and stir until desired color is obtained.
- When the cookies are dry, outline the cookie and add any designs now. Pour the sprinkles over the wet icing and shake off the excess. The sprinkles should just stick to the wet icing. Set the cookie aside to completely dry. Overnight is best.
- For the Ducks: Fill with yellow cookie icing on the body and orange icing on the bill. Dry. Add blue icing to the bottom and add blue crystals. Dry. Outline with yellow and add three lines for the wings. Cover with yellow crystal and dry.
- For the Carrots: Fill with orange cookie icing and dry.Outline with orange icing and coat in orange crystals. Pipe on green and cover in green crystals. Dry.
- For the Bunnies: Fill with white cookie icing and dry.Outline with icing and add sprinkles. On the leaping bunny, I used Cake Mate Classic Pearls and on the sitting bunny I used Cake Mate Nonpareils in Polka Dots. Use half a mini marshmallow or a Cake Mate Easter Egg decor for the tail.
- For the Lambs: Fill with white cookie icing and dry.Add dots of icing and cover with Classic Pearls.
Equipment
Nutrition

Images, text and all other content Copyrighted©Karyn Granrud, Susanne Queck and Wunderlander Verlag LLC, or ©Pro Stock Media via Canva.com. Unlicensed republishing permitted. As an Amazon affiliate, we earn on qualified purchases.