You won’t believe how easy this Christmas Sugar Cookie Recipe is to make and decorate. The secret is to relax, have fun, and don’t use royal icing.
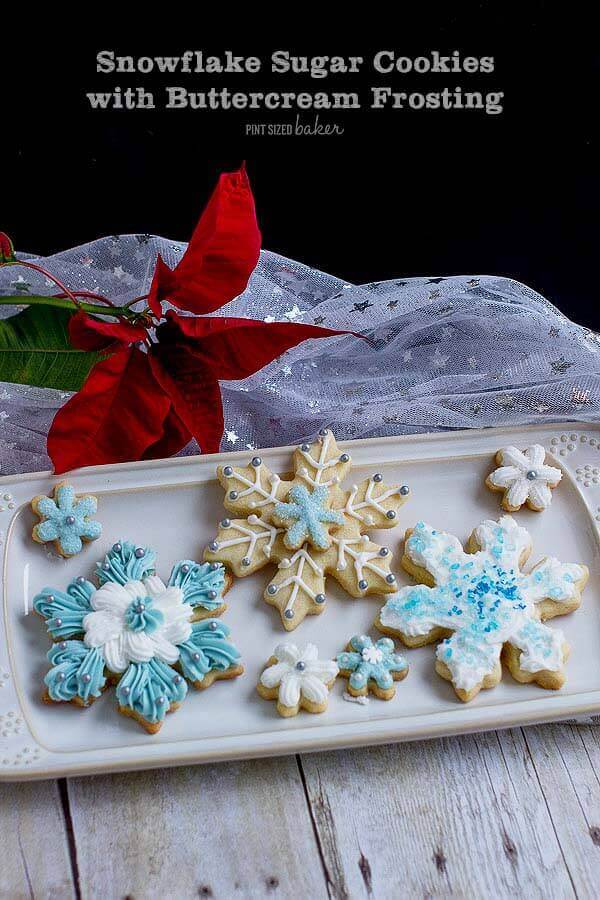
Snowflake Christmas Sugar Cookie Recipe with Buttercream Frosting
You won’t believe how easy these sugar cookies are to make and decorate. The secret is to relax, have fun, and don’t use royal icing. Don’t get me wrong – I love Christmas cookies with icing, but using buttercream frosting is easier, cleaner, and makes for a big puffy cookie that is soft to bite in to. I was so thrilled with how these beautiful snowflake sugar cookies turned out. Give this easy Christmas sugar cookie recipe a try and you won’t be disappointed.
When I was contacted by Wilton’s on behalf of Micheal’s Craft Store, I was ecstatic! I shop there all the time and it’s where I get a lot of my baking and decorating products. So, when they wanted to work with me to promote their Christmas Cookie Cutters and decorations I was IN!
I decided to make three different styles of cookies with the buttercream frosting. You can make easy decorations by just smearing frosting on the cookie and adding sprinkles. Then you can make a pretty decoration by piping lines out and layering a little cookie on top if you’re comfortable using a piping bag. Then, make a puffy and beautiful sugar cookie covered in frosting that looks more like a pillow.
I loved how easy they were. Check out the fun video I made for you!
See?? So easy! Now, go bake and decorate!What Cookie Cutter is needed?
You can find the snowflake cookie cutter at your local Micheal’s Craft Store. It comes with the large 3 inch cutter and a smaller 1 inch cutter that I used to layer the cookie. I did try to cut out the center of the snowflake with the smaller one, but it made it very difficult to handle and it ended up breaking.
Once your comfortable with a few designs, get creative with it. There’s nothing stopping your creativity except for you. Get the kids involved and let them decorate their heart out.
When I handed the piping bags over to my daughter, I had poured just a bit of the sprinkles in their lids, so she had to pinch the sprinkles instead of dumping them on the cookie. I also placed the cookies on cookie sheet to catch all of the sugar and excess that falls off of the cookie. Of course, there was still a mess, but it was much more contained.
Aren’t those big, puffy snowflake sugar cookies beautiful? ILOVETHEM!!
I loved the color! That Color Right system from Wilton is great for getting me the perfect color every time.
I loved the design! I think that the puffy frosting is just as beautiful as royal icing cookies.
For these cookies I used these Wilton Products
My family loved this Christmas Sugar Cookie Recipe and I’m sure your family will too. Thanks so much to Wilton’s And Micheal’s for supplying me with all of these great Christmas Cookie supplies!
More Christmas Cookies
Snowflake Sugar Cookies

Christmas Sugar Cookies shouldn't be hard. Here are three easy ways you can decorate cookies using buttercream instead of royal icing.
Ingredients
Sugar Cookie Recipe
- 1 1 /2 C Powdered Sugar
- 1 C Butter, unsalted
- 1 tsp Vanilla
- 1/2 tsp Almond Extract or use your favorite Tasteology Flavor
- 1 egg
- 2 1/2 C Flour
- 2 tsp baking powder
Basic Buttercream Recipe
- Ingredients
- 1 C Shortening
- 2 pounds Powdered Sugar
- 2 tsp Wilton Clear Vanilla extract - or use your favorite Tasteology Flavor
- ½ C milk
- Wilton Color Right (1 drop blue and ½ drop brown)
Instructions
For the Cookies
- Beat butter and sugar until smooth. (Cover your mixer with a damp towel to keep powder from covering your surrounding area.)
- Add in vanilla and almond extract with the egg.
- Combine dry ingredients and stir in.
- Wrap up 1/3 of the batter in plastic wrap and refrigerate 2 hours or overnight. Repeat with remaining dough. It can also be placed in the freezer to bake at a later time.
- Preheat oven to 350 deg F.
- Roll out 1 packet on a lightly floured surface or a silicon mat. Roll to 1/3 inch thickness and cut snowflake shapes. Place shapes on a cookie sheet lined with parchment or a silicon baking sheet and place in the freezer for 20 minutes.
- Bake for 10 - 12 minutes depending on the size. Remove from oven and let sit for 2 minutes before transferring to cool on a wire rack.
For the Buttercream
- Cream the shortening and vanilla extract in a stand mixer for best results. Gradually alternate the sugar and milk until you have reached a thick, frosting consistency. Divide the batch of buttercream in half. One half will remain white, the second half will be colored blue.
- Remove half from the white and add in another tablespoon of milk to thin it out. Transfer to a prepared piping bag with a Wilton No.3 tip.
- Transfer the remaining white frosting to a prepared piping bag with a Wilton No.18 tip.
- Color the remaining remaining frosting to a light pale blue. This was achieved using the Wilton Color Right system of 1 drop blue and ½ drop brown.
- Remove half the blue buttercream and add an additional tablespoon of milk to thin it out. Transfer to a prepared piping bag with a Wilton No.3 tip.
- Transfer the remaining blue frosting to a prepared piping bag with a Wilton No.22 tip.
Decorate the Cookies
- Easy decorations : Pipe out the thicker frosting on a cookie and use an offset spatula to spread out the buttercream. Add sprinkles to decorate. The kids love this technique.
- Moderate decorations : Pipe out a snowflake design with the thinner buttercream and add pearls and sugar to make them “sparkle”. Be sure to press the pearls into the frosting to be sure that they will stick once the buttercream dries.
- Advanced decorations : If you’re comfortable piping shells, take the thicker frosting with the No.18 or No.22 tip and pipe shells on the tips of the snowflakes. Add pearls and sprinkles to decorate using your tweezers to help place the pearls exactly where you want them.
Notes
Notes from Karyn - These cookies and decorations do stay soft. The frosting crusts over, however, the decorations will crack if they are poked at. They can be gently stacked, but will not travel will if stacked. It’s best to keep them on a flat surface until ready to add to your Christmas cookie plate.
There will be more than enough buttercream for two or even three batches of cookies. You can freeze the buttercream to save for another cookie decorating event. Just allow it time to thoroughly thaw, then whip it back to your desired consistency.
Nutrition Information:
Yield:
36Serving Size:
1Amount Per Serving: Calories: 256Total Fat: 11gSaturated Fat: 6gTrans Fat: 0gUnsaturated Fat: 5gCholesterol: 22mgSodium: 32mgCarbohydrates: 39gFiber: 0gSugar: 31gProtein: 1g
Nutrition information isn’t always accurate.
Stephanie says
December 7, 2015 at 11:10 amThese look so good and they are completely gorgeous – as all of your goodies always are 🙂
Karyn Granrud says
December 7, 2015 at 11:39 pmThanks 🙂 I was quite proud of them! I totally impressed myself with those big puffy ones!
The Food Hunter says
December 7, 2015 at 2:47 pmWhat a beautiful cookie to add to the holiday spread
Karyn Granrud says
December 7, 2015 at 11:22 pmIt sure is. Too pretty to eat, but they tasted so good not to eat them.
Ashley @ Wishes and Dishes says
December 7, 2015 at 3:18 pmI love the idea of putting buttercream on top of my sugar cookies! Great recipe and idea!
Karyn Granrud says
December 7, 2015 at 11:22 pmI was really happy with the result. Buttercream for the WIM!
Lauren Kelly Nutrition says
December 7, 2015 at 4:26 pmThese are the most perfect looking cookies EVER!
Karyn Granrud says
December 7, 2015 at 11:21 pmThanks so much! I loved how they turned out!
Kimberly @ The Daring Gourmet says
December 8, 2015 at 12:27 amThose are GORGEOUS! It’s almost a shame to eat them, I’d just want to keep them out to look at! 🙂
Karyn Granrud says
December 9, 2015 at 9:40 amThanks!! Just think of how special the recipient would feel to get these.
Lora @savoringitaly says
December 8, 2015 at 6:14 amI had to giggle when you say relax, have fun and don’t use royal icing! Ha! I think using buttercream is definitely less stressful (at least for me it is). Such beautiful holiday cookies!!
Karyn Granrud says
December 9, 2015 at 9:36 amTotally. I love RI, but sometimes it’s just too stressful! Thanks for stopping by
Teresa says
December 8, 2015 at 8:42 amBeautiful!
If you have time, I would love for you to share this post over at the Holidays Celebration link party that is live right now! It’s such a great post, I’m sure our readers would love it too!
Karly says
December 8, 2015 at 11:33 amBeautiful cookies! Thanks for linking up with What’s Cookin’ Wednesday!
Erin @ Texanerin Baking says
December 8, 2015 at 1:44 pmI need those cookie cutters! You made such pretty cookies with them. 🙂 Sugar cookies are probably my favorite cookie at Christmas-time and I know I’d love these.
Karyn Granrud says
December 9, 2015 at 9:31 amI love sugar cookies too! But I love them even more when someone else makes them. Lol!
Heather | All Roads Lead to the Kitchen says
December 8, 2015 at 6:35 pmI love all three levels, they look beautiful together!
Karyn Granrud says
December 9, 2015 at 9:35 amThanks. The three levels make it easy for everyone. I know I’d be intimidated just looking at them.
Kirsten/ComfortablyDomestic says
December 8, 2015 at 7:32 pmThe puffy icing on the snowflakes really brings them to life. Gorgeous job!
Karyn Granrud says
December 9, 2015 at 9:27 amThanks! I loved the result and was very pleased that they were so puffy.
Carolyn says
December 8, 2015 at 8:55 pmI much prefer butter cream over royal icing so yay on these!
Jessica says
December 8, 2015 at 9:52 pmKaryn, these are just beautiful! You are so talented.
Karyn Granrud says
December 9, 2015 at 9:25 amThanks so much Jessica!
Angie @ Big Bear's Wife says
December 9, 2015 at 3:35 pmI saw your video for these on Facebook! They’re so perfect! I love the blue and white for Christmas cookies! Such a nice break from the red and green!
Karyn Granrud says
December 9, 2015 at 8:09 pmThanks! When I was done making them, my husband commented that they were Frozen cookies. Not really what I was going for, but kinda, yeah.
Rose | The Clean Dish says
December 10, 2015 at 8:11 amWow, these snow flakes look fantastic!! They’re almost too pretty to eat. You really have a talent for decorating cookies!
colleen says
December 10, 2015 at 9:22 amSO so pretty! We make Snowflakes as well, however we take the easy way out and drizzle them with icing. I want to make a few of your advanced ones, my daughter would flip.
colleen says
December 10, 2015 at 9:22 amSO so pretty! We make Snowflakes as well, however we take the easy way out and drizzle them with icing. I want to make a few of your advanced ones, my daughter would flip.
Nutmeg Nanny says
December 10, 2015 at 10:25 pmThese cookies are so cute and festive! I never make cutout cookies because I’m always worried they will take all day BUT I’m the first to gobble up cutout cookies when they are at parties. I simply can’t resist a pretty frosting decorated cookie.
Jennifer Tammy says
December 15, 2015 at 1:33 pmOh my goodness, could those Advanced Cookies be any more gorgeous? Thanks so much for sharing the how-to video, I actually think I could try to replicate them now 🙂
Where did you get the tweezers – can you share a link? I didn’t see it in the post.
Karyn Granrud says
December 15, 2015 at 1:39 pmThanks so much Jennifer. You can practice on wax paper then re-use the frosting. I got the tweezers in a jewelry crafting pack like this http://amzn.to/1J9NlyZ on Amazon. I use them A LOT! It’s perfect for little accents without getting your fingers in the way.
Gabby says
December 15, 2015 at 5:12 pmThese look like so much fun! I need to take decorating lessons from you because I am still trying and I have cupcakes down but cookies can be harder for me for some reason! Thank you for linking up with us at the Tips and Tricks Link Party! I am looking forward to seeing what you have linked up this week!
Karyn Granrud says
December 15, 2015 at 5:49 pmIf you can pipe on cake, I”m sure you can decorate a cookie! I have faith in ya 🙂
Sarah Walker Caron says
December 17, 2015 at 7:29 amWhat beautiful cookies!
Sarah Walker Caron says
December 17, 2015 at 7:30 amWhat beautiful cookies! I would love these on our holiday cookie tray!