Man, you guys LOVE Cake Pops!
I was not expecting such a response to my Chick Cake Pops and my Snowflake Cake Pops, but since you love ’em so much, I’m gonna keep making them.
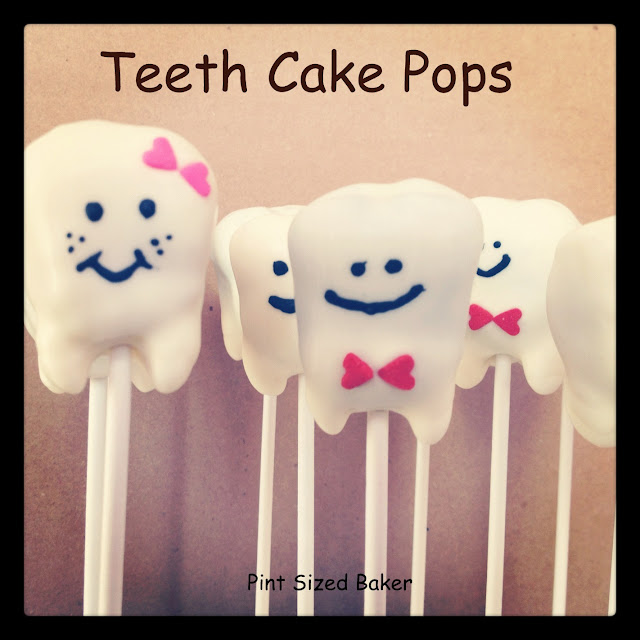
I had a special request for some Teeth Cake Pops, so I decided to document my process.
Making Cake Pops can be challenging if you’ve never made them before. To learn more about the cake pop batter and sizing cake pops, please watch my videos. (Over there to the right.)
To make a dozen cute little Teeth Pops you will need:
1/4 of a 9 x 13 cake – your choice
1 heaping teaspoon of frosting – your choice
1 bag White Candy Melts
Lollipop sticks
a stand (to hold the lollipop sticks) Styrofoam or Florist Foam works well
Sprinkle hearts and flowers
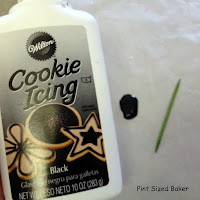
Wilton Cookie Icing in Black OR Food Writer Pen
HOW TO MAKE TEETH CAKE POPS
Mix the cake and the frosting to make the cake pop batter.
Divide the mixture into 12 equal parts. I generally get 12 pops per 1/4 cake.
TIP * Use a tablespoon to measure them out.
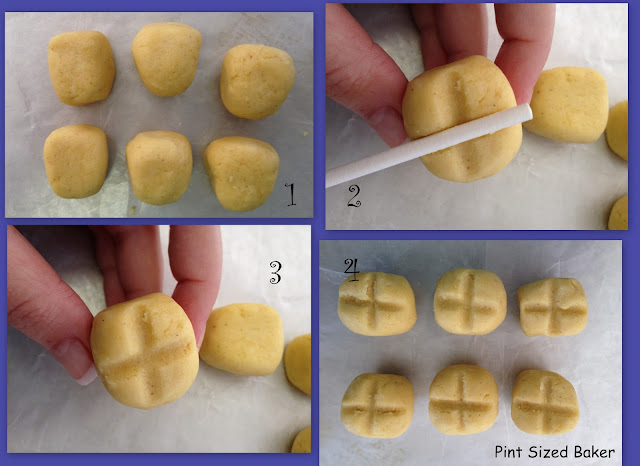
Shape them into a trapezoid. Longer and fatter on top, tapering down to the root.
Using the lollipop stick, make an indentation on the top part of the trapezoid. This is the top of the molar-like tooth.
Once all the indentations are made, pop them into the fridge for 15 minutes.
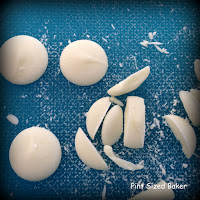
Take a few of the candy melts and cut them into thirds. These pieces will become the roots.
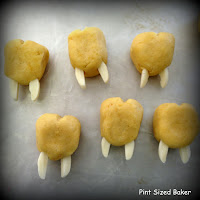
Pull the teeth out of the fridge and insert the candy pieces.
They kinda look like insect pincers, don’t they? Um… let’s not think about insects….
Set them back in the fridge while you melt the rest of the candy wafers.
Start off at 1 minute at 100% power, then only 30 second increments at 70% power. You want to stir and stir and NOT get it too hot. If you pop it back in the micro and it only seems to be thicker, it’s too hot! Stir, stir, stir and wait 15 minutes for it to cool. Or add more melts to absorb the heat. It will thin out. I promise. Be PATIENT!
Back out of the fridge to dip!
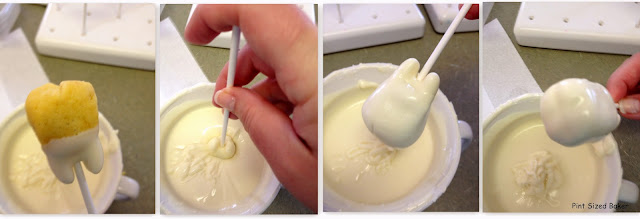
Holding the top of the tooth, dip the bottom third of the pop. Dip the roots first, then add the stick.
You may end up with some candy between the roots that’s a bit thick, just use your stick to remove it or shake the excess off.
Stand your half dunked pop in a stand until the rest have their pants on as well.
Once all the pops have their pants on, go back to the first one for a full dip.
Dunk the pop up to, but not over, the stick.
Tap off the excess and allow them to dry back in your stand.
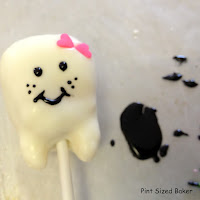
While the coating is wet, add the heart sprinkles for hair bows for girls or bow ties for boys or add a flower sprinkle. Be creative.
All dressed! Now for some make-up!
If you are adding a face design, my secret thing to use is Cookie Icing. Much better results compared to the Food Writers. I just don’t get the best results from them.
Add a small amount of the icing to your work surface and using a toothpick, draw on the face.
TIP * A little bit goes a loooooong way!
I’ve also used silver and gold luster dust to add the look of cavities. Maybe you can make a little crown for one! Or make a bridge connecting two! Oh the possibilities!
And that’s it!
Take them your Bestie or your Dentist!
They are also great for little ones who are expecting a visit from the Tooth Fairy.
Do you want to know where I got my great Cake Pop Stand? Check out KC Bakes for her wonderful assortment of sizes and designs!
Have fun with it!
Now, go play with your food!
I link up to these great parties!
Images, text and all other content Copyrighted©Karyn Granrud, Susanne Queck and Wunderlander Verlag LLC, or ©Pro Stock Media via Canva.com. Unlicensed republishing permitted. As an Amazon affiliate, we earn on qualified purchases.
.jpg)
.jpg)

.jpg)
.jpg)
.jpg)

Love these!!! The next time I sew this little tooth pillow I am making your tooth pops to give as a gift along with it. Simply precious!
http://www.abakershouse.com/2012/01/toothy-tooth-fairy-pillow.html
That tooth is adorable! The cake pops would make a tasty addition. Thanks so much for visiting.
Those are too cute! New follower 🙂
So cute! Great job! I will have to make some for my son-in-law, the dentist:)
Thanks for coming over. You have so many cute ideas on your site and inspire me to do better. I'm sure your son-in-law (and his staff) would love some cake pops. My dentist's office did 🙂
So. Flipping. Cute! I totally wish I could do that. Would you make me some instead?
Sure!! Next time you're in West Virginia, I'll make you a whole bunch!! I Promise 🙂
Yeah … more cake pops!! These are so cute too! Thanks for sharing at my party! Have a great weekend 🙂
These are so cute! I get so frustrated trying to make cake pops that involve much more than sprinkles 🙂
Don't get frustrated. These are simple pops to make. No sprinkles or decorations to worry about. I'm sure you could make these!
These are so so so adorable. You amaze me!
Thanks so much.
How cute!
Super adorable. Pinning this idea until my hubs graduates from dental school!
Thanks so much and good luck to him with schooling! I'm sure the entire class would love them!
How adorable! I have a friend who is a dentist so I sent her the link to these. She's going to love them!
I would love it if you would link up at Watch Out, Martha!’s first link up party: Martha Mondays, going on now through Wednesday! Hope to see you there!
http://www.watchoutmartha.net/2012/05/martha-monday-link-up-party.html
Thanks so much for the invite. I linked up. Good Luck with your first link up party and thanks for visiting.
Brilliant!
Adorable!
-Four Sisters
Those are so adorable!
I am not surprised that you've had such a response on your other cake pops- THEY ARE AMAZING! These ones are just as impressive. I freaking love kitschy things like these- they'd be perfect for someone becoming a dentist, or a toothfairy party. You could easily make then sort of gory and have them for a Halloween party! If you have the time, I'd love for you to share on Sweet Sharing Monday! http://saynotsweetanne.com/2012/sweet-sharing-monday-4/
These are the cutest things ever! LOVE!!! Thank you so much for sharing these at Whimsy Wednesdays.
those are the cutest things! I have wanted to make tooth pops for a while but always thought it would be a pain to shape them, this is perfect!
WOWWWW
These loo Fabulous and you are extremely creative – I really admire that
Awesome job
The perfect cheering up at the dentist's office or orthodontist's office 😉
These are so cute – you're so creative!
These are too cute!
These are soooo stinkin cute! Love the little bow ties on the males 🙂 I would LOVE to have you share this at my link party and even enter the giveaway thats going on!
http://www.pincushioncreations.com/2012/05/homemade-by-you-11-giveaway.html
These are so stinking cute!! Kids will go nuts over these. We loved having you link up to our "Strut Your Stuff Saturday." We hope you'll be back soon! -The Sisters
I love this, such a great idea. I hope you'll stop by and add this and any other posts you're proud of to my Wednesday What We Wore and Made Link party
marissa
http://raegunwear.blogspot.com
Totally cute cake pops! Thanks for sharing and inspiring 🙂
Hi Karyn,
These are just adorable! Thank you so much for sharing your awesome recipe with Full Plate Thursday. Hope you have a great week and come back soon!
Miz Helen
My tooth pops keep falling apart when I dip them in the chocolate! Thoughts?
Love these! I want to make them for my brother-in-law, a recent dental school grad but he lives an hour away. Could I make them and freeze them until I deliver them?
Some Really Beautiful images and great inspiration. Thanks for the share
I’m a little confused why frosting is an ingredient but not used in the instructions. Currently making these!
Because I use use canned frosting in all of my cake pops. You only need a little bit so start with just a tablespoon. Have fun making them!